Pipe Cleaner Spider & Spider Web: Fun Easy Halloween Craft
Happy Halloween! We love the Halloween holiday and any projects that celebrate it. This pipe cleaner spider and spider web craft was, by far, the easiest pipe cleaner craft we’ve ever made, not to mention, pretty cute. If you’re into Halloween too or just looking for a fun, super easy (and cheap) kids craft for the season, this is for you!
For the spider I chose basic black (pipe cleaners and pom poms), but feel free to get creative with the colors. As for the spider web, I chose 2 shades of purple (3 if you count the second web I made). Purple and Orange tend to show up during Halloween, so I thought it would be a fun way to add color to the project. It was also easier to show you how to do it with 2 different colors. Feel free to use another color(s) or black for a more traditional look.
Hope you enjoy! Let’s get creative!
FOR MORE PIPE CLEANER KIDS CRAFTS:
PIPE CLEANER SPIDER
What You’ll Need:
- 2 Black Pipe Cleaners
- 2 Black Pom Poms (1″ Size)
- 2 8mm Googly Eyes
- Hot Glue & Gun (or Craft Glue)
- Wire Cutter

QUICK NOTE ABOUT GLUE: I used my hot glue gun for this project because it sets so fast. Craft glue is perfectly fine however, if you don’t have a glue gun or are working with young kids.
CHECK OUT MORE GREAT KIDS SUPPLIES: Resources I Love
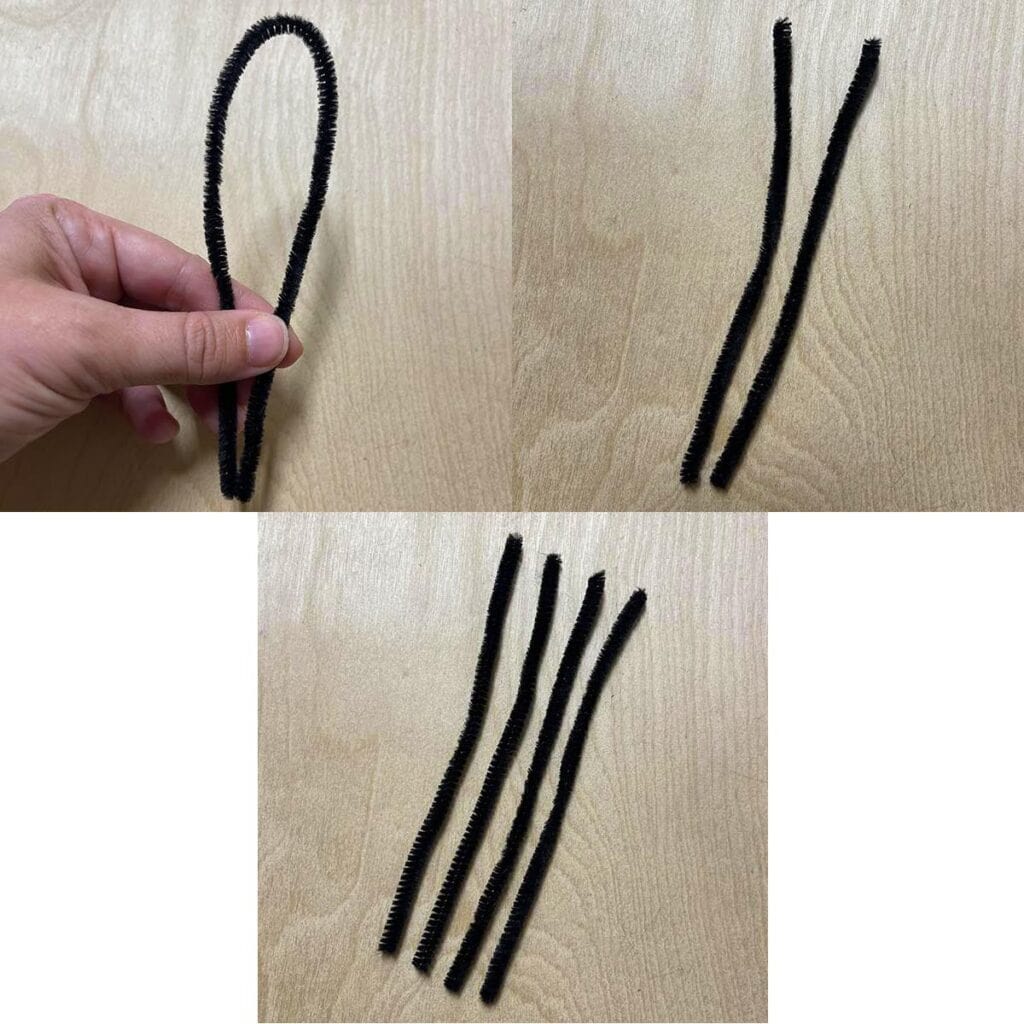
1. Take one pipe cleaner and bend it in half. Cut it into 2 equal pieces with the wire cutters. Do the same thing with the second pipe cleaner (leaving you with 4 equal sized pieces). These will be the spider’s legs.
2. Hold all of the pipe cleaner pieces together and twist them in the center 2 or 3 times to create the body (where you’ll attach the pom poms later on). NOTE: Twist enough that the group of pipe cleaners stay together. If they do not stay together, it will be difficult to bend the legs later on.

3. Bend the legs, so they are sticking out from the twisted body, like in the pics below.

4. Now is the time to make your spider stand up. Bend each leg down (at about 90 degrees) at the center of the leg and add a little bend out at the end for a tiny foot.

5. Holding the spider’s body at eye level, push the center down a bit and adjust the legs as needed to make him stand up again. We are creating space for the pom poms to sit.

6. Glue the two pom poms together with hot glue or craft glue. Smoosh them together really well while the glue is cooling/drying to create a thick long body for the spider.

7. Add glue to the top of the twisted part on the spider (not to the pom poms). Then add the pom pom body to the spider. (NOTE: The reason the glue is added to the body and not the pom poms is that its the exact amount of glue needed. If you add to the pom poms, you may add too much or not enough for a good connection).

8. Finally, glue the googly eyes to one end of the pom pom body for that cute spider face.

PIPE CLEANER SPIDER WEB
What You’ll Need:
- 4 Pipe Cleaners Of Same Color (for web’s spokes)
- 6 Pipe Cleaners Of Same Color (for web’s rings)
- Wire Cutter

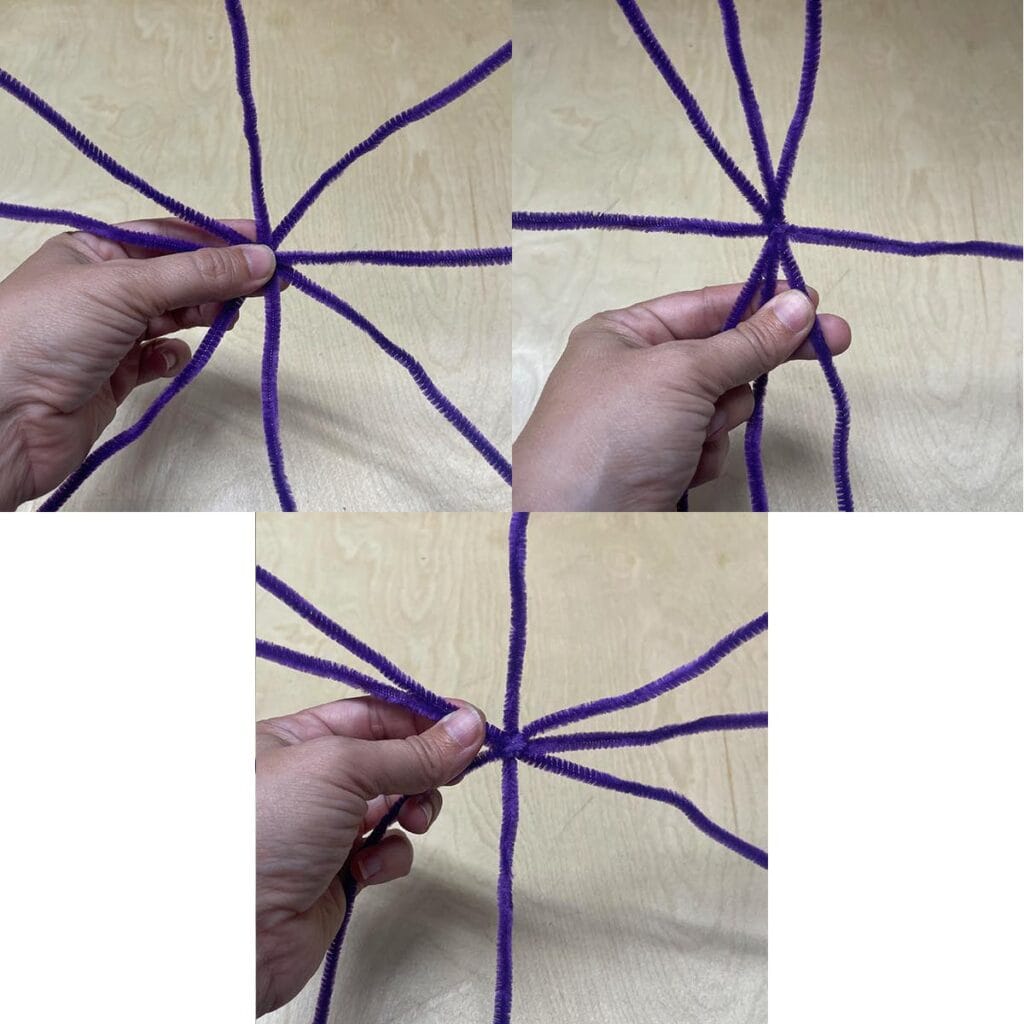
1. Take the 4 pipe cleaners for the spider web’s spokes and arrange them in your hand like a clock or sliced pizza, see left pic below. Then take the horizontal one (the one going sideways) and twist it tightly around the other three in the center (center pic). Bend the diagonal pipe cleaners closer to the horizontal one and wrap the vertical one around those three in the same way (right pic). (This will secure the spokes, until we can add the web’s rings)
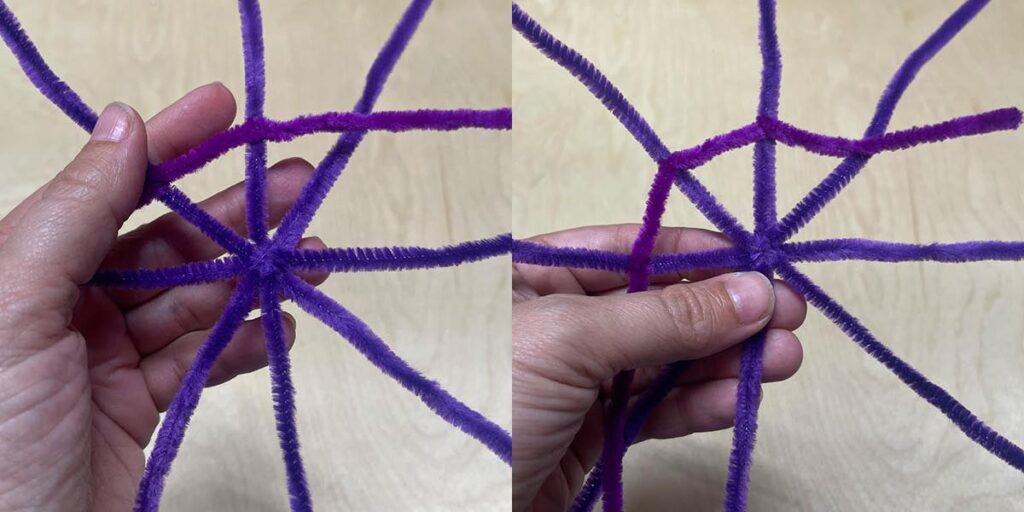
2. Place one of the pipe cleaners (for the web’s ring) about 1″ from the center of the web and wrap it around the spoke (TIP: Center it on the spoke because you can get about half way around with one pipe cleaner).

3. Rotate the web so the spoke next to the wrapped one is pointed straight up and wrap the ring pipe cleaner around it. (TIP: If you are trying to make the rings be fairly consistent, make sure that the ring stays 1″ from the center and pay attention to how much space is between each spoke. They should be at a 45 degree angle from each other.) Continue wrapping around each spoke until it completes one side of the web (leaving the tails/ends—we’ll finish them in the next step). Repeat the other side with a second pipe cleaner.
4. Once the ring is complete, wrap the tail of the pipe cleaner around the last spoke (assuming its long enough), and cut the extra length of tail with the wire cutter. Do the same with the other tails to complete the ring. (NOTE: Keep the cut tails as they will be needed for the last ring.)

5. Start the middle ring with the third pipe cleaner. Repeat steps 2-3 to complete the ring, with the middle ring about 1″ from the inside ring.

6. Finish off the middle ring, like in step 4.

7. Start and complete the outside (and last) ring of the spider web, with the outside ring about 1″ from the middle ring. (TIP: Since the last 2 pipe cleaners will not be able to fully get around the ring, use the tails from the inside ring to finish the ring. I started the last full pipe cleaner towards the end, rather than centered to minimize how many extra tail pieces I used.)

8. Once the pipe cleaner spider web is complete, let’s finish it by getting rid of the sharp spoke ends. Cut each spoke leaving about 1/4″.

9. Bend each spoke end back on itself and press firmly, so you cannot feel the metal end when you run your finger along it.

10. Last step to make it look more spider web-like…gently bend each piece of the ring in a bit towards the center so they are slightly curved. This makes it look more like a web and less like a dart board. Finished!

Hope this not-so-spooky Halloween pipe cleaner craft help you get excited for the holidays! My youngest loved playing with them after we were finished.