
DIY Beaded Christmas Ornaments – Easy Spiral Ornament Tutorial
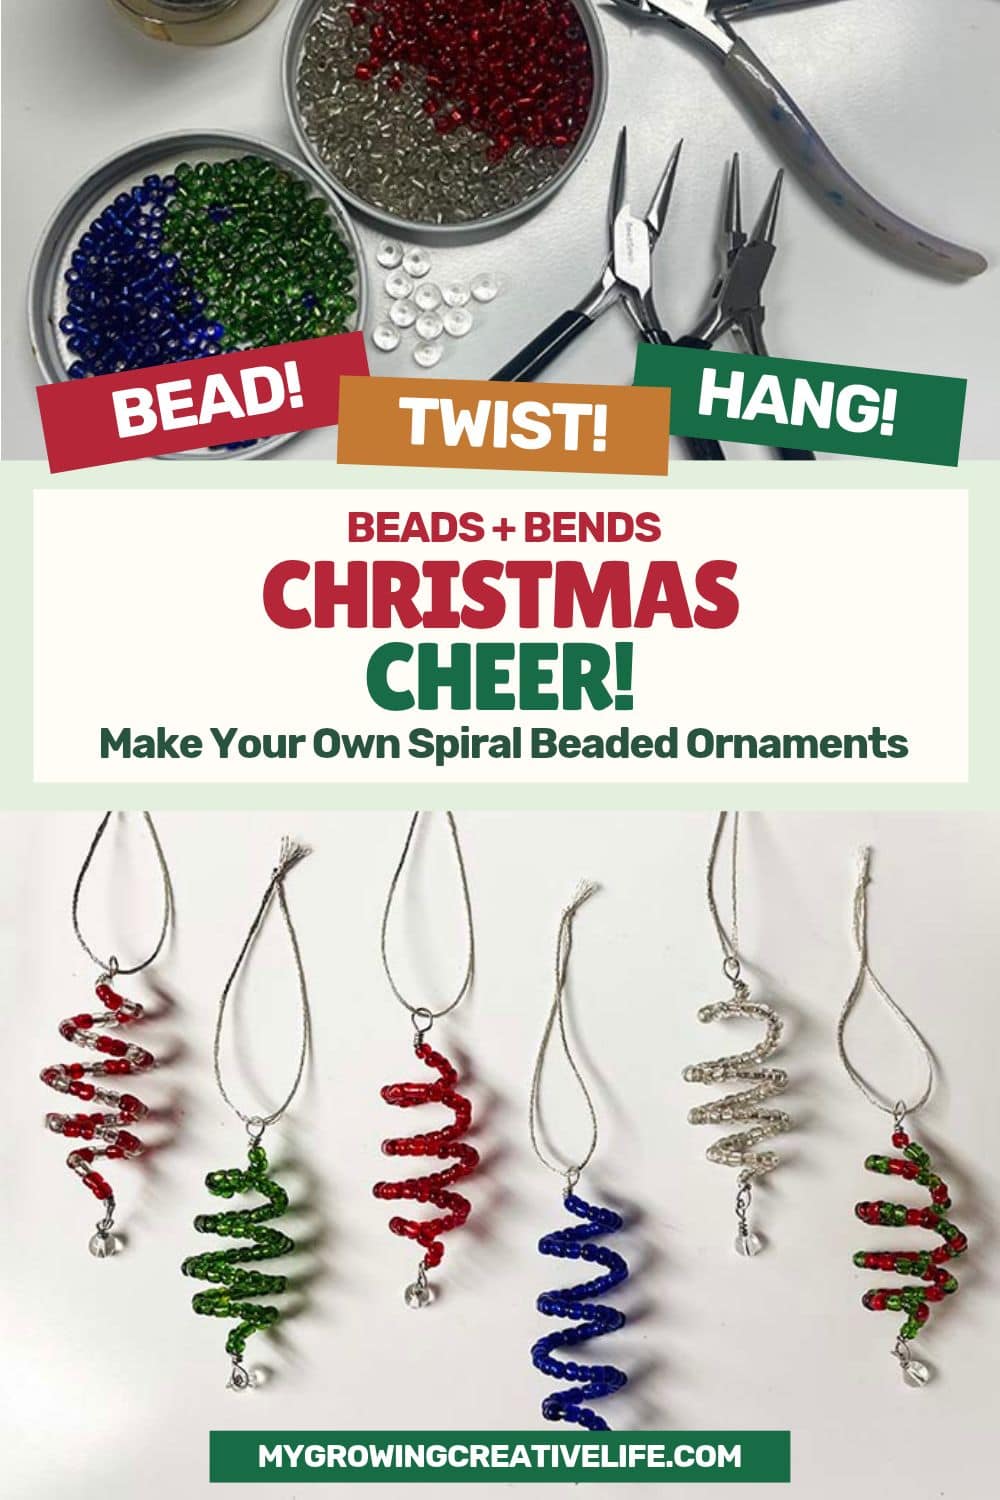
Every year we create new Christmas ornaments because its fun and its become a tradition. This year’s choice is spiral beaded Christmas ornaments. A lot of beading projects are time consuming and tedious, but I promise you these beaded ornaments can be created fairly quickly without a ton of supplies and can be made assembly line style, so you can make a bunch at once.
For this project, I finally got a chance to use these translucent seed beads that one of my besties gave me too many years ago. The perfect Christmas colors and size for this project! I found some similar ones at Michaels, so check out the material list below. I’m a fan of seed beads because they are inexpensive and look nice (no kids craft here) and the 8/0 size we use is a bit larger than most traditional seed bead projects, so they are easier to handle and see.
Ready to create something sparkly, colorful and festive?
MORE FUN DIY ORNAMENTS TO TRY:
Spiral Beaded Christmas Ornaments
WHAT YOU’LL NEED:
- 8/0 Seed Beads
- Round Beads (I used 7mm round clear ones)
- 20 Gauge Wire
- 2″ Headpins (1 for each ornament)
- Chain Nose Jewelry Pliers
- Round Nose Jewelry Pliers
- Jewelry Wire Cutter
- Ruler or Tape Measure
- Sharpie or Highlighter
- Fine Ribbon, Embroidery Floss or Ornament Wire Hanger (for hanging ornaments)
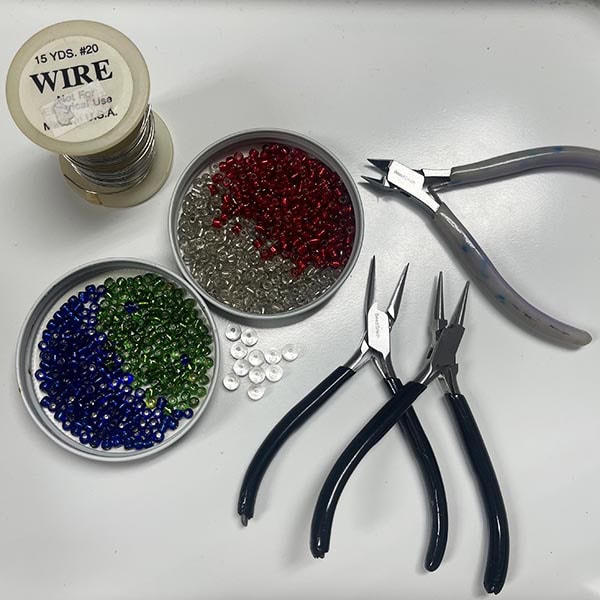
TIPS ABOUT SUPPLIES:
- SEED BEADS – For this project I pulled beads from my stash (hence why they are not shown in packaging), but I took a swing by Michael’s to see what’s available right now. Any type of size 8/0 seed bead will do, but I found the glass or translucent ones particularly festive. Do not go smaller, like a 10/0 or 11/0, as they will not fit on the wire. Any larger sizes like a 6/0 will shake on the wire and not have as much of an elegant effect.
- ROUND BEADS FOR THE BOTTOM – Again, I pulled from my stash, but any bead around 7, 8, or 9mm will work. I chose a clear round bead, but feel free to get creative as long as its of a similar size.
- WIRE – For this project you should specifically look for 20 gauge wire. It’s sturdy enough to hold its shape well while still being able to manipulate. The 8/0 size beads also fit on it very well. Anything thicker like 16 or 18 gauge will be hard to string or work with. Anything thinner won’t hold the spiral shape.
- OPTIONS FOR HANGING – There are so many options for hanging these that will look nice. A very thin ribbon or, in my case, DMC’s metallic embroidery floss looks elegant. Traditional wire ornament hooks will also work great (and are less work to tie).
PREPPING THE WIRE
If you plan on creating multiple ornaments, the supplies can be prepped all at once. This makes the assembly process much easier.
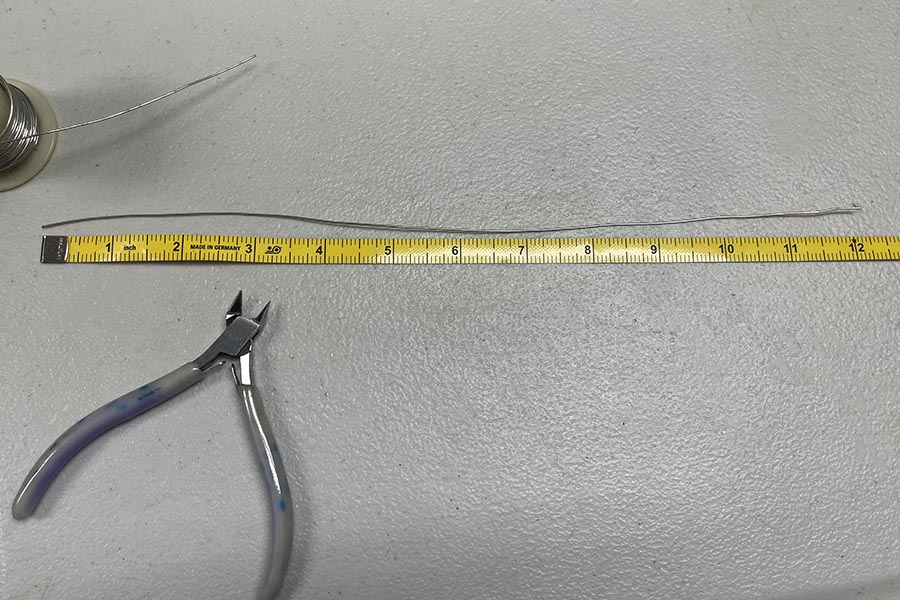
1. Each ornament will need about 12” of wire, so measure and cut as many pieces as you will be creating. TIP: If your wire comes on a spool, straighten it out as much as possible before cutting. It will make it easier and be more accurate.
STRINGING THE BEADS (& CREATING LOOPS)
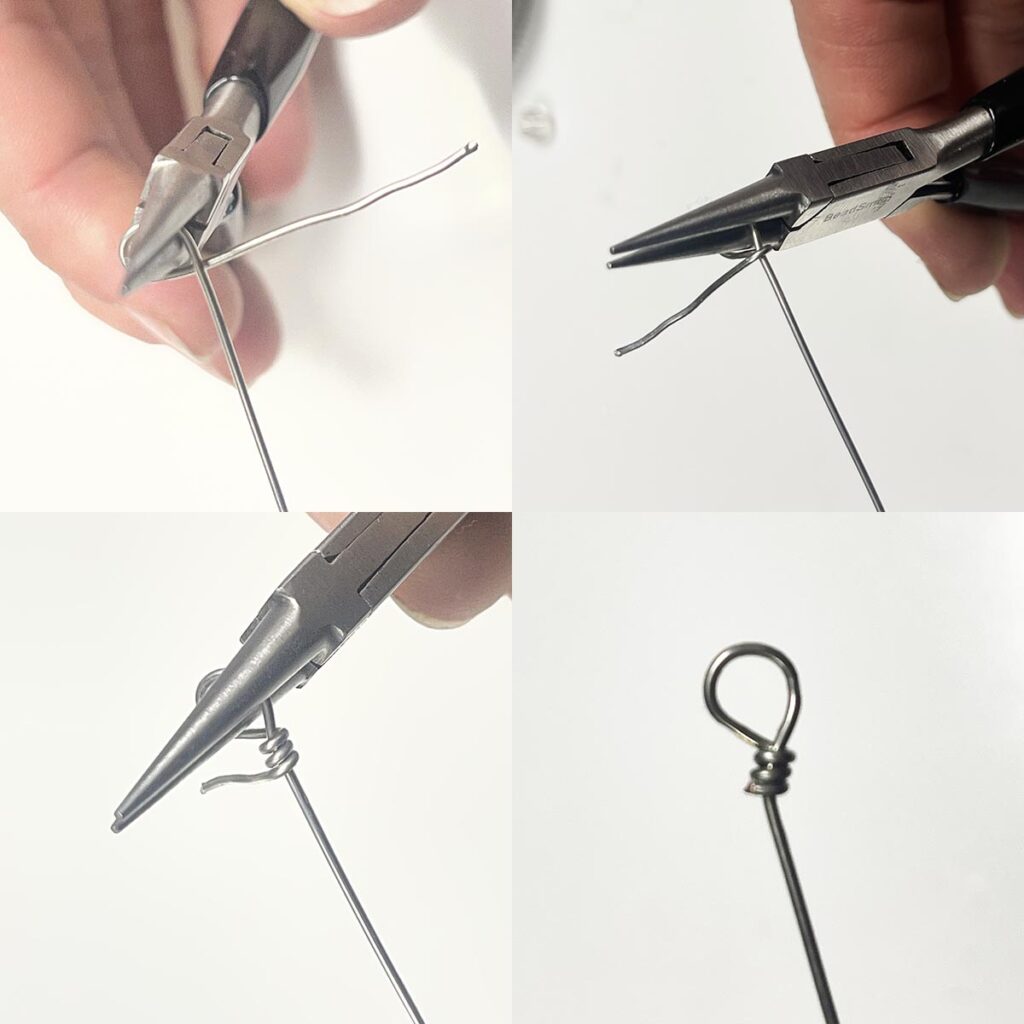
2. Once all of your pieces are cut, take one piece and set the rest aside. Using your round nose pliers, hold the wire about 1” from the end. Wrap the long end of the wire around one tip of the pliers to create a loop.
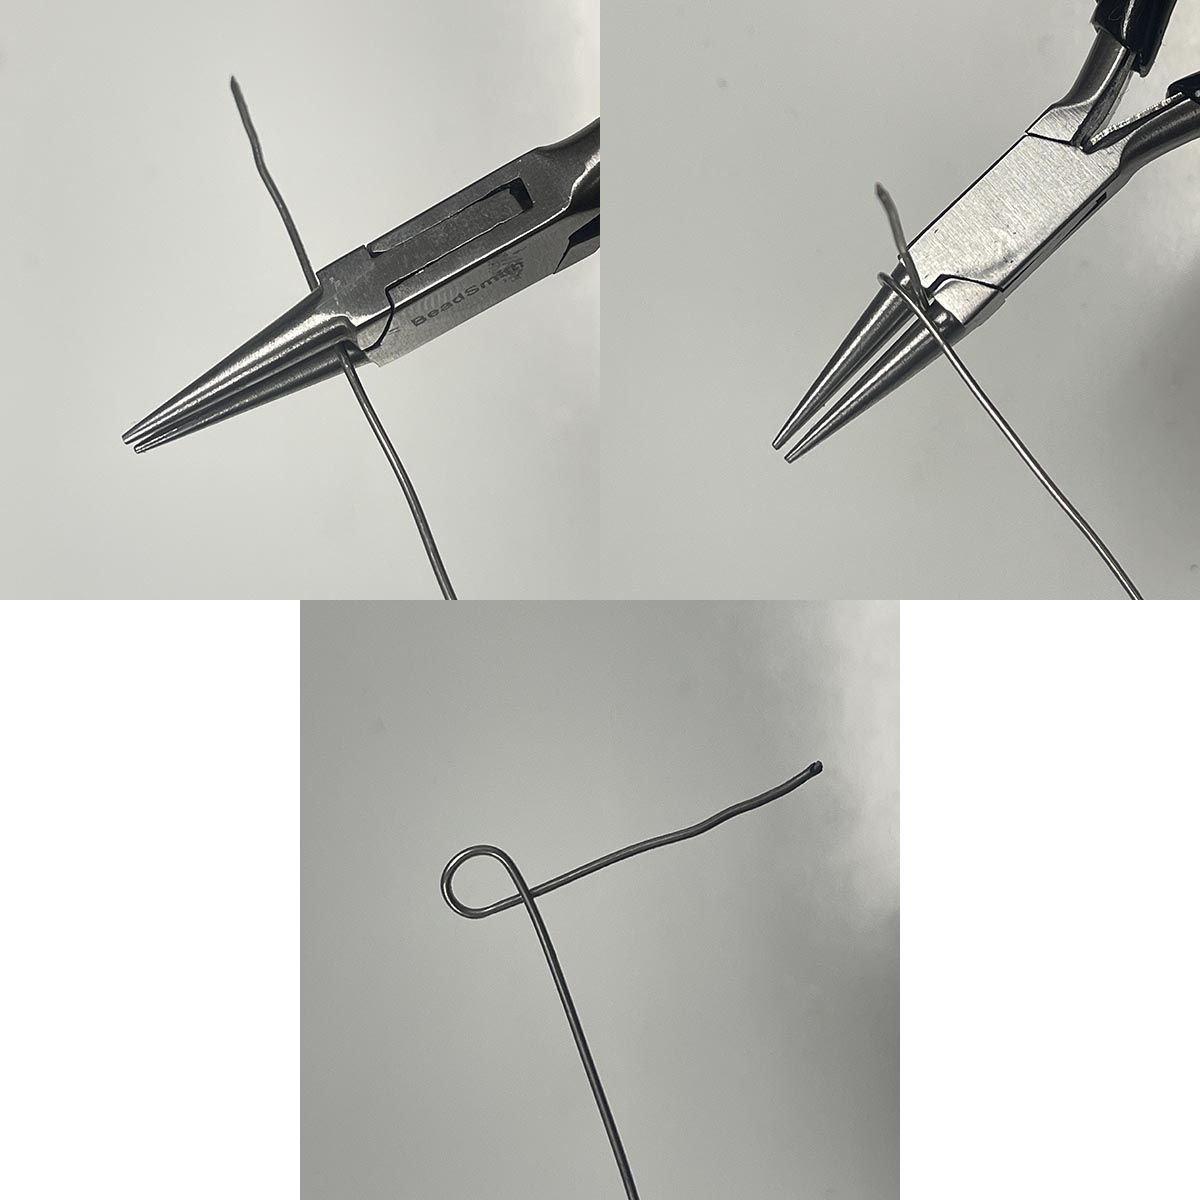
3. To secure the loop, reposition the loop on the pliers, so you can grasp the short end of the wire with the chain nose pliers. Wrap the short end (tail) around the bottom of the loop several times. Clip off any extra.
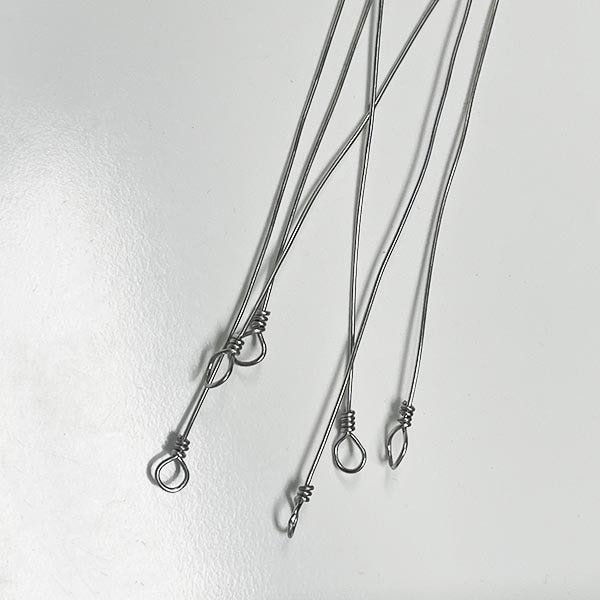
4. (Optional) If you have additional wires for more ornaments, repeat step #3.
5. Now is the fun part! Adding the beads! TIPS FOR STRINGING BEADS: Since the wire is nice and sturdy like a needle, use the end to pick up each bead (or two). Slide the bead back on the wire and then let it slip through your thumb and finger down onto the loop. This will keep the beads from falling off while you add more.
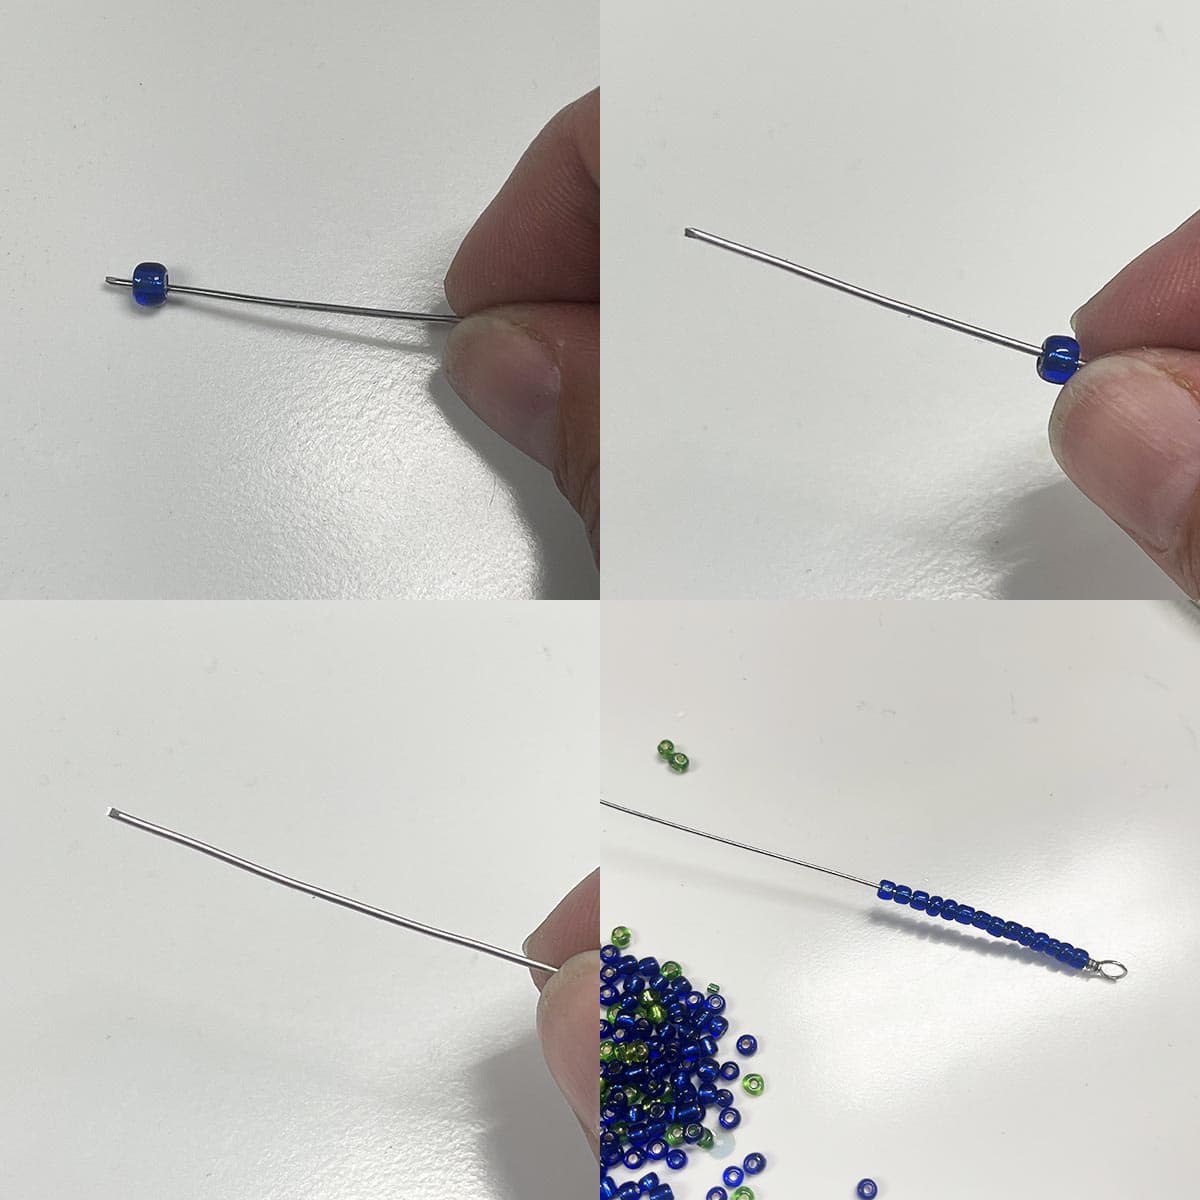
6. Continue adding beads until there is a little over an inch left of exposed wire. Now, take one or two beads back off. Trust me! It will make sense later. Then, using your round nose pliers, hold the wire about 1” from the end (leave a bit of space between the pliers and the last bead).
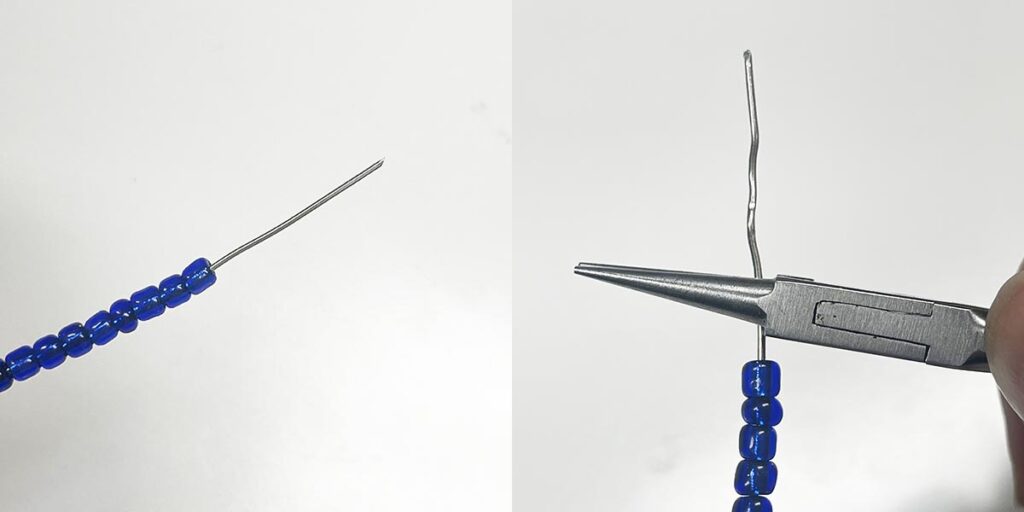
7. Now let’s create the bottom loop, similar the the top loop. Wrap the long end of the wire around one tip of the pliers to create a loop. Reposition the loop on the pliers and use the chain nose pliers to wrap the tail around the bottom of the loop several times. Clip off any extra.
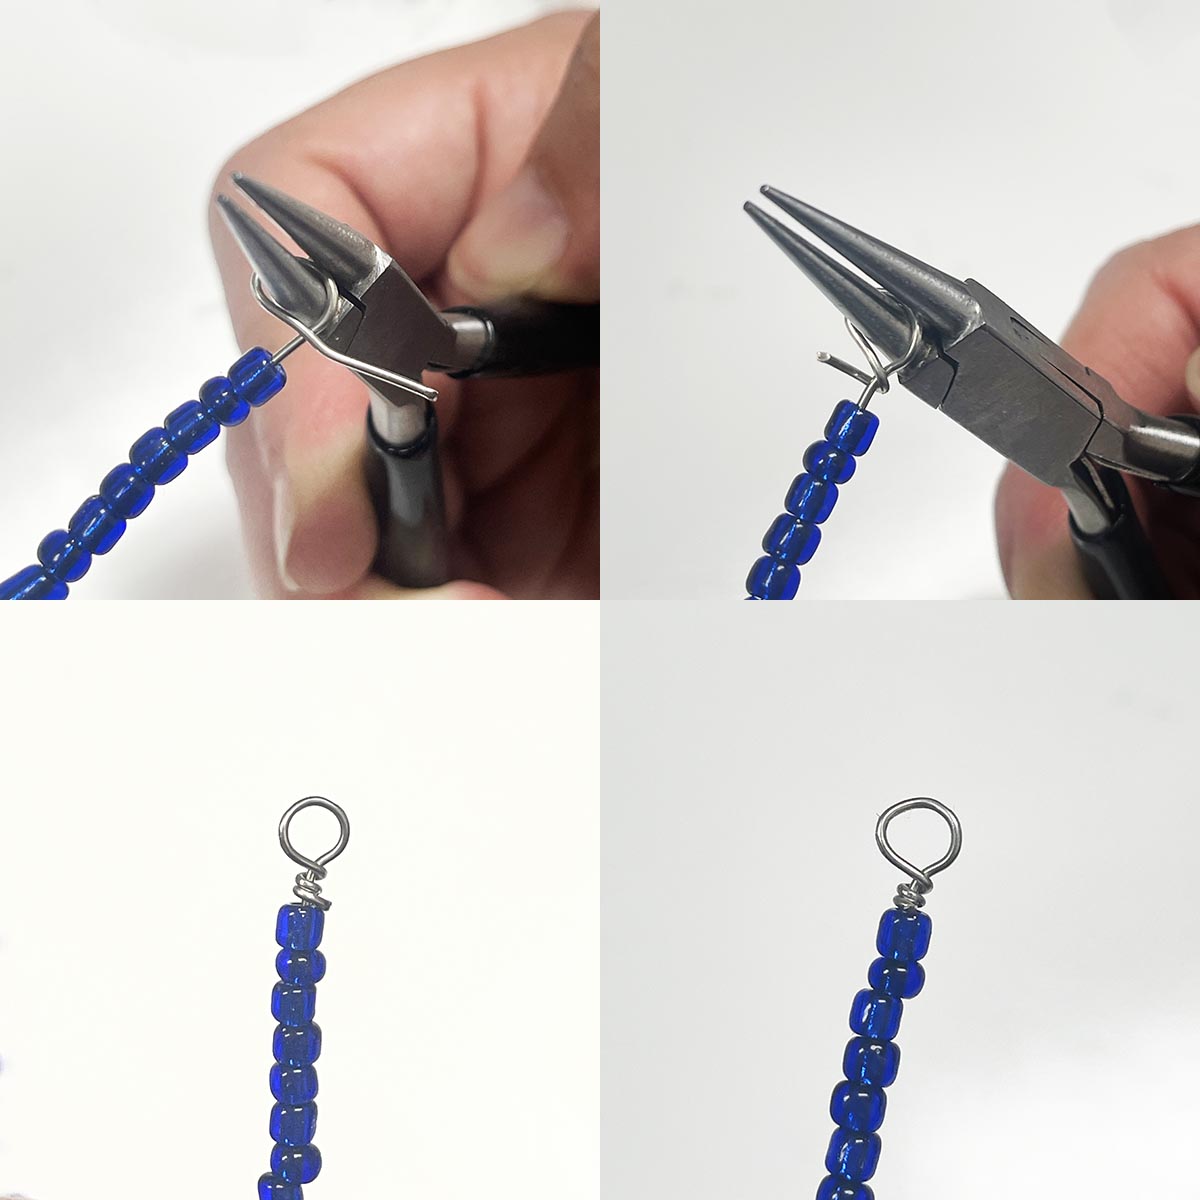
Your ornament should now look something like this (see below).
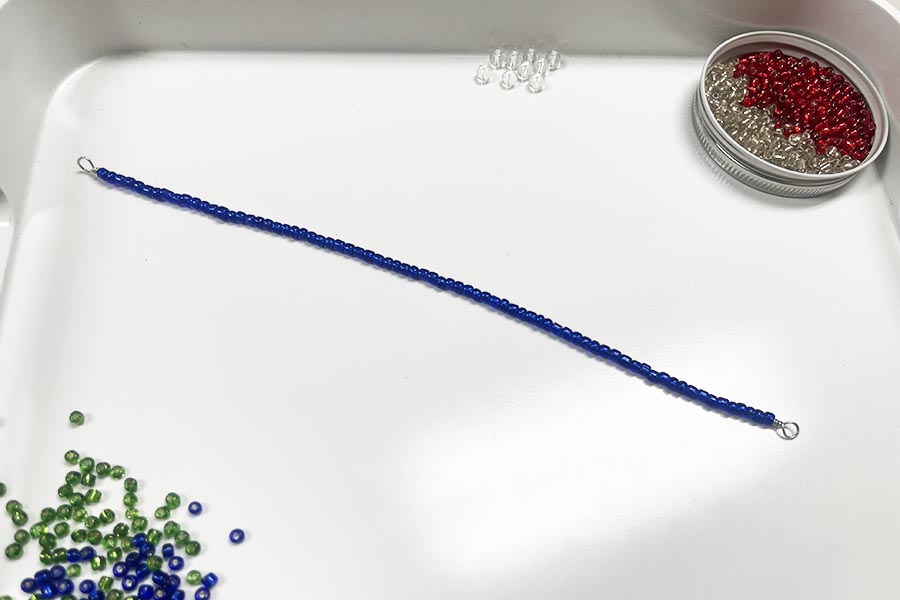
8. (Optional) If you are creating additional ornaments, now is the time to string the beads and create the bottom loops.
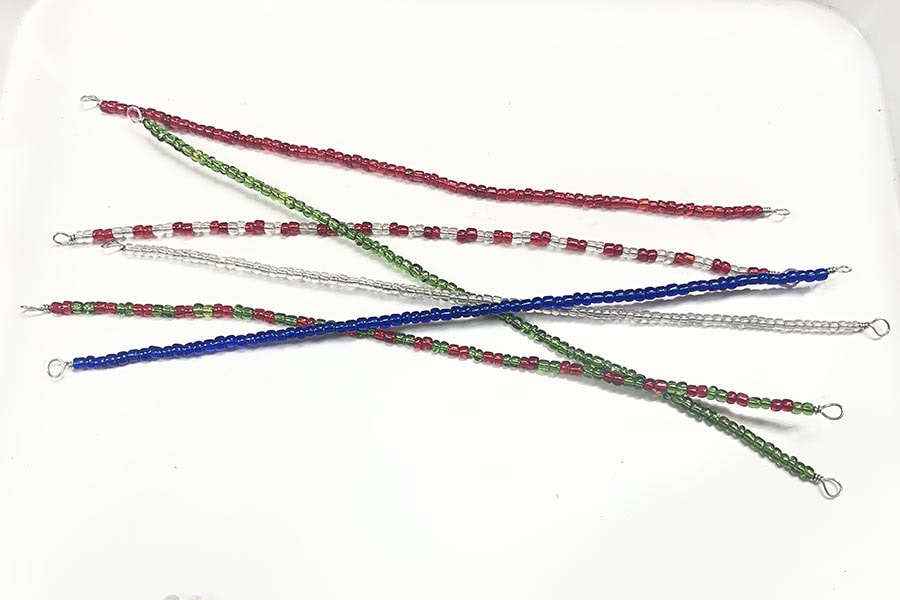
CREATING THE SPIRAL
9. Once each ornament is strung, it’s time to create the spiral. Take your sharpie/marker/highlighter and wrap the ornament around it. Do not worry about the loops yet. We will bend them into the correct position shortly. IMPORTANT NOTE: Remember earlier when I mentioned taking a few beads off to create extra space. This is important now when you need that space to wrap the wire around. IF YOU DO NOT HAVE ENOUGH SPACE to wrap it around completely, DO NOT WORRY!! I had this issue several times. Take your chain nose pliers and break a single bead by carefully crushing it with the pliers. These are small enough beads that it shouldn’t take too much effort to break and one (or maybe two) should be enough to wrap it around all the way.
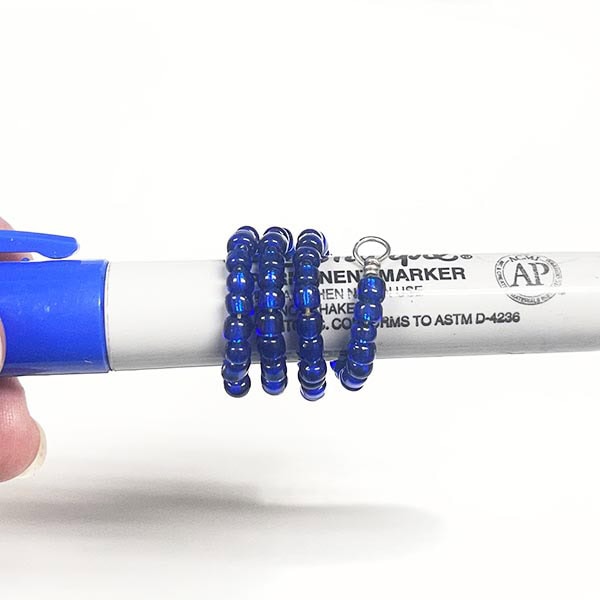
10. Take the ornament off of whatever you wrapped it around and push the ends in a bit towards the center of the spiral. Hold one of the loops with the pliers and gently bend it back at the base until the loop is pointed straight out the top or bottom. Repeat for the other loop.
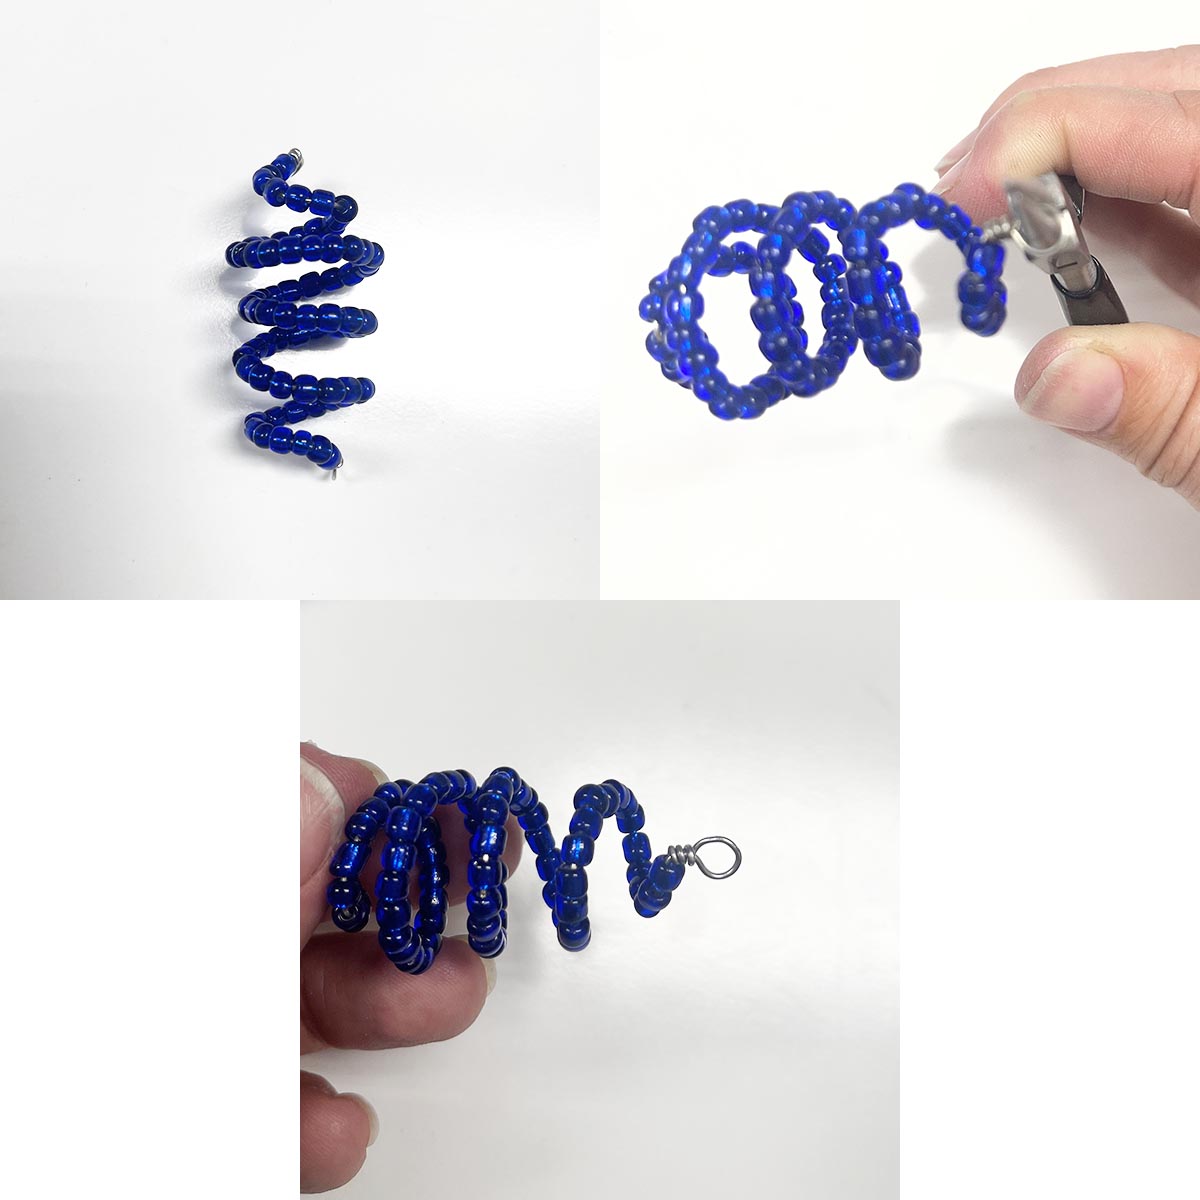
11. (Optional) Repeat steps #9-10 for each of your other ornaments.
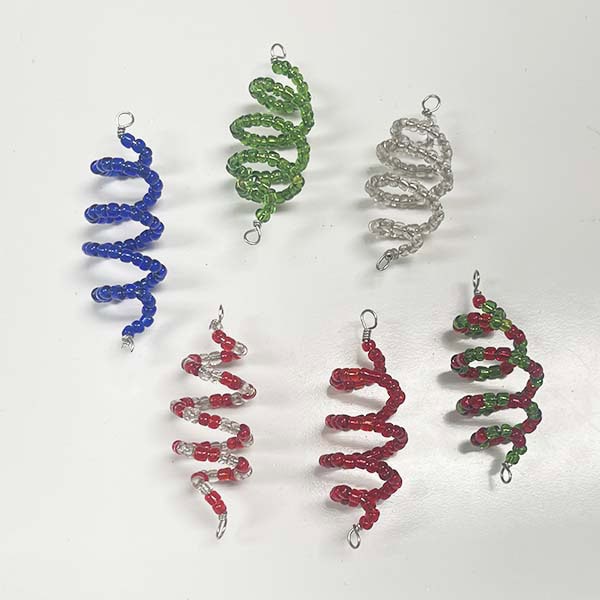
FINISHING THE BEADED ORNAMENT
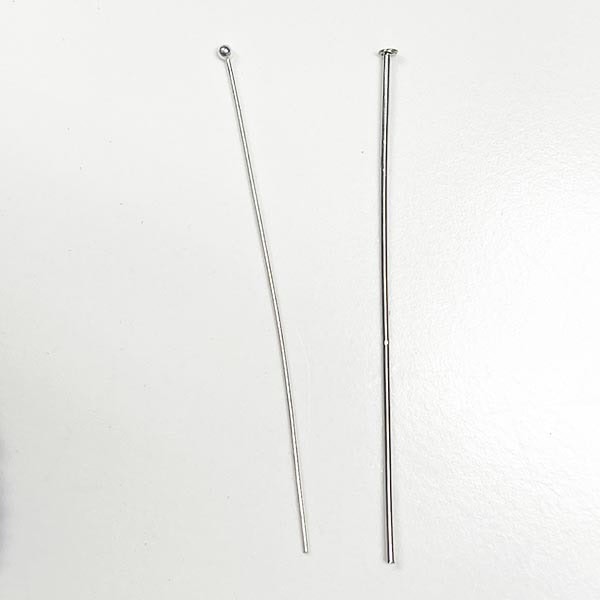
For the final part of these ornaments, we need to add a hanging bead from the bottom loop. Instead of using wire which requires that you finish the end somehow (so the bead doesn’t fall off), we are going to use a headpin which can be found in the jewelry section of your craft store. There are several types of headpin, but the ball head or flat head options, shown below, work best. I chose a flat head option.
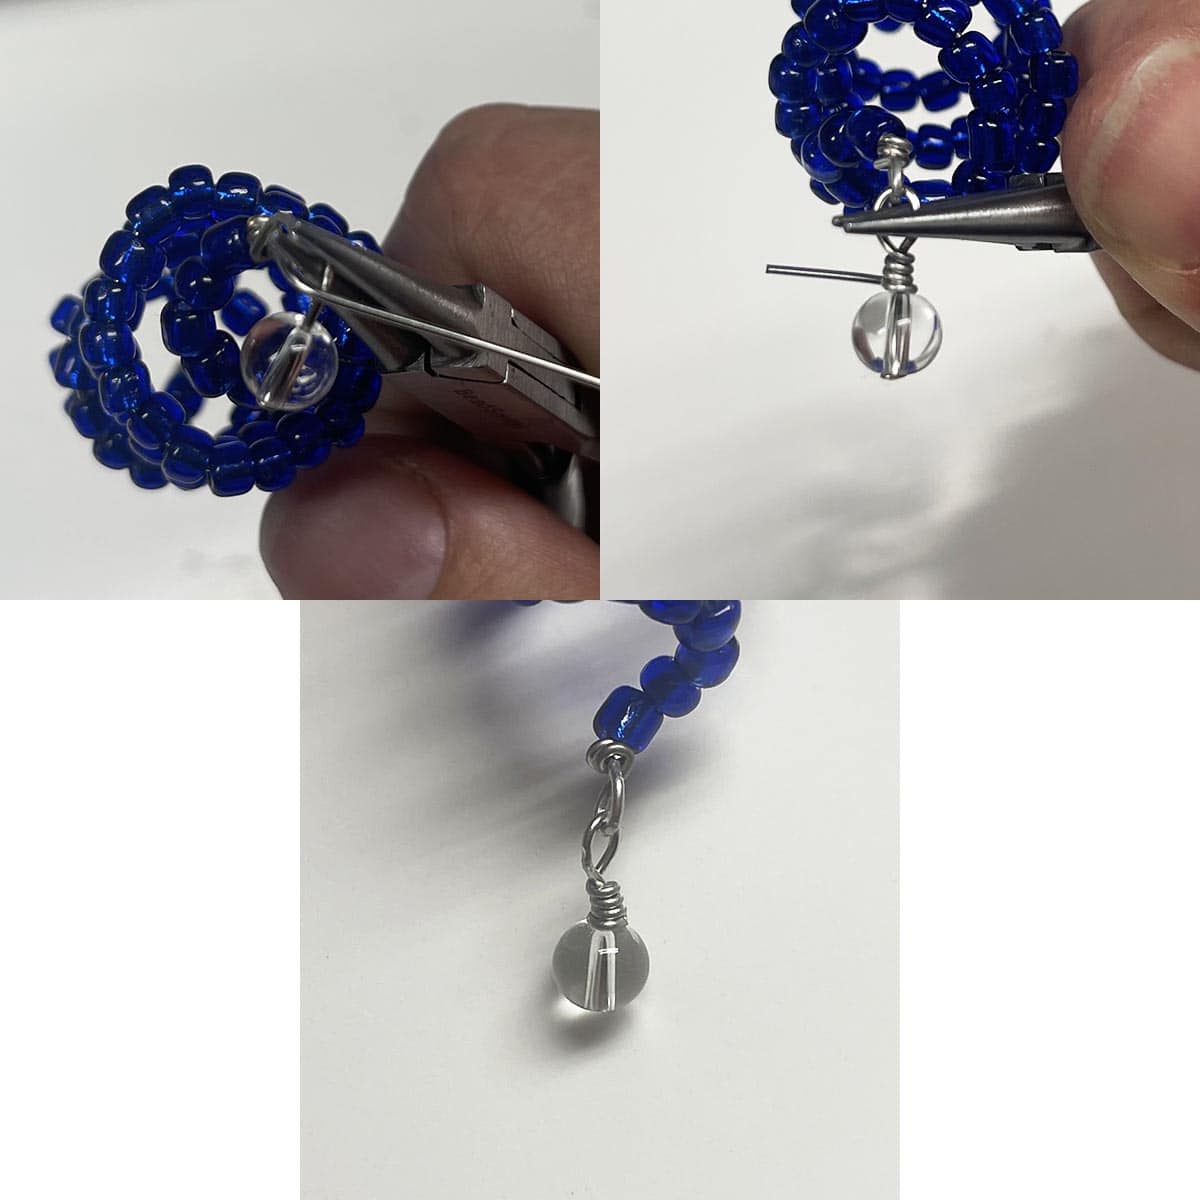
12. Slide the headpin through the round bead and hold it with the round nose pliers about a 1/4″ above the bead. The process is similar to the other loops you created earlier except this time, once you’ve created that first loop, slide it through the bottom loop of the ornament to connect the two.
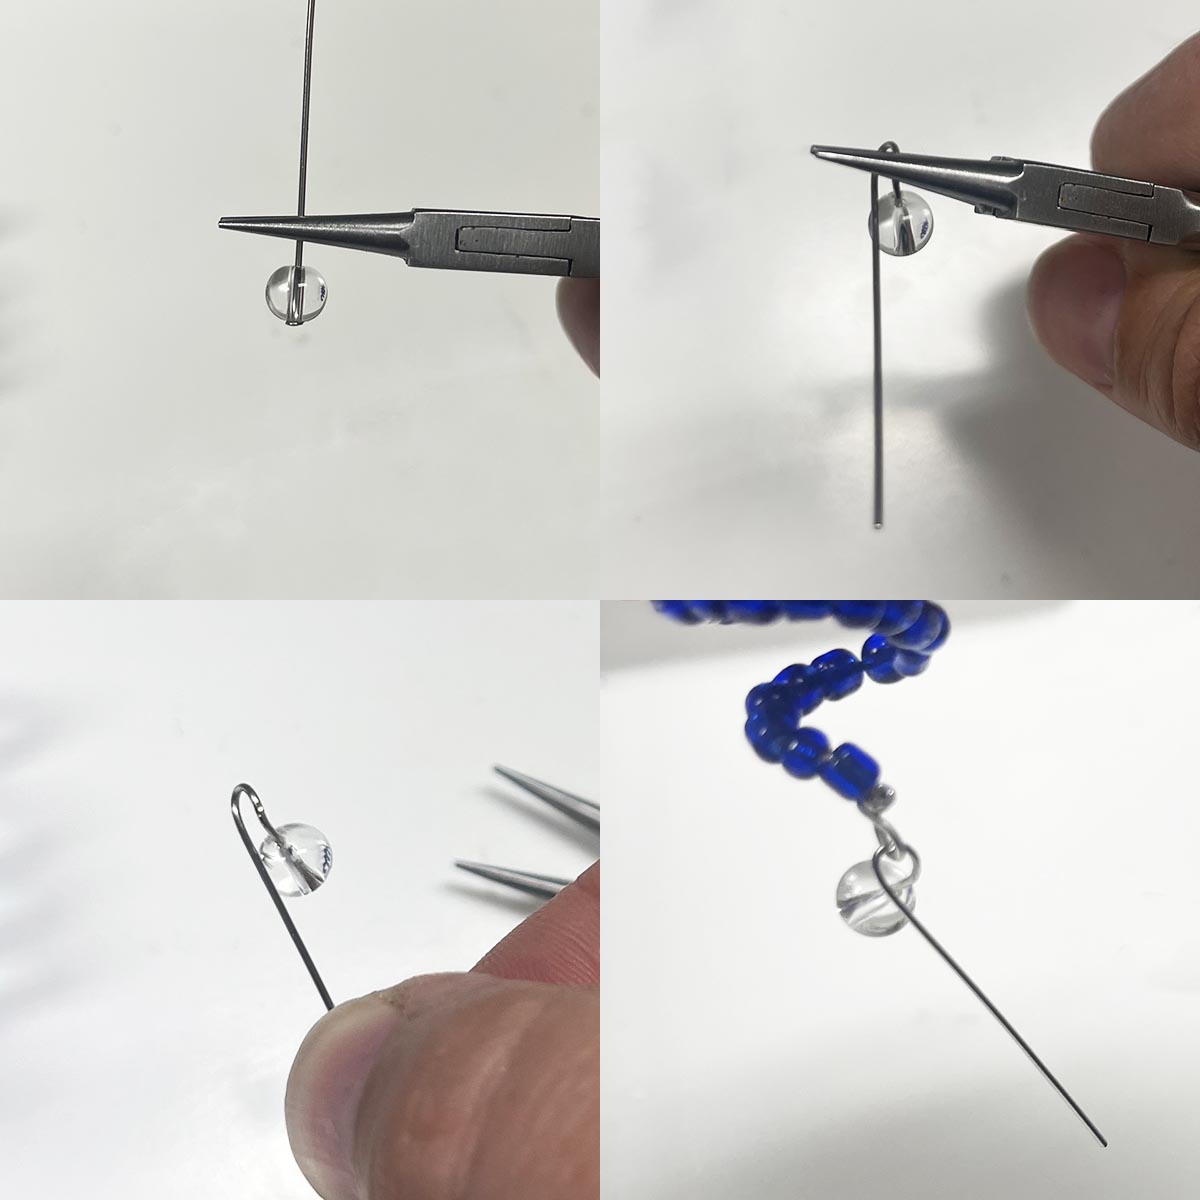
13. Now, carefully reposition the round nose pliers back into the bead’s loop and use the other pliers to wrap the tail around the base of the loop, securing it. Cut any extra off and you are DONE!
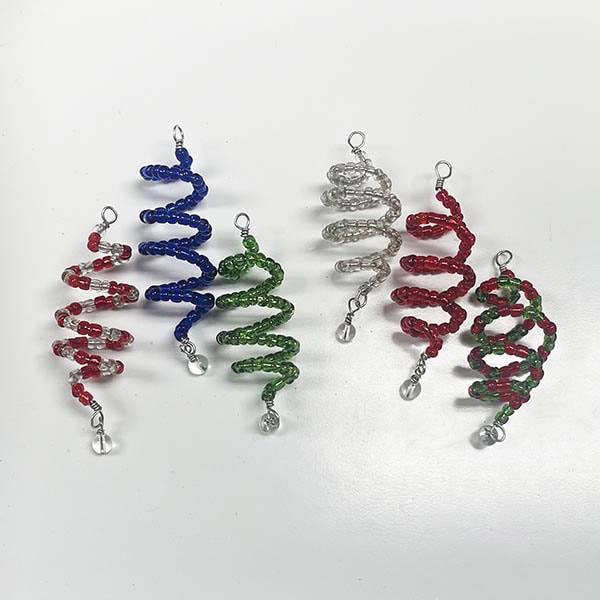
14. (Optional) Finish all of your other ornaments.
15. Use a traditional wire ornament hook or, for a more decorative effect, some thin ribbon or metallic embroidery floss (in my case) to create the loop for hanging.
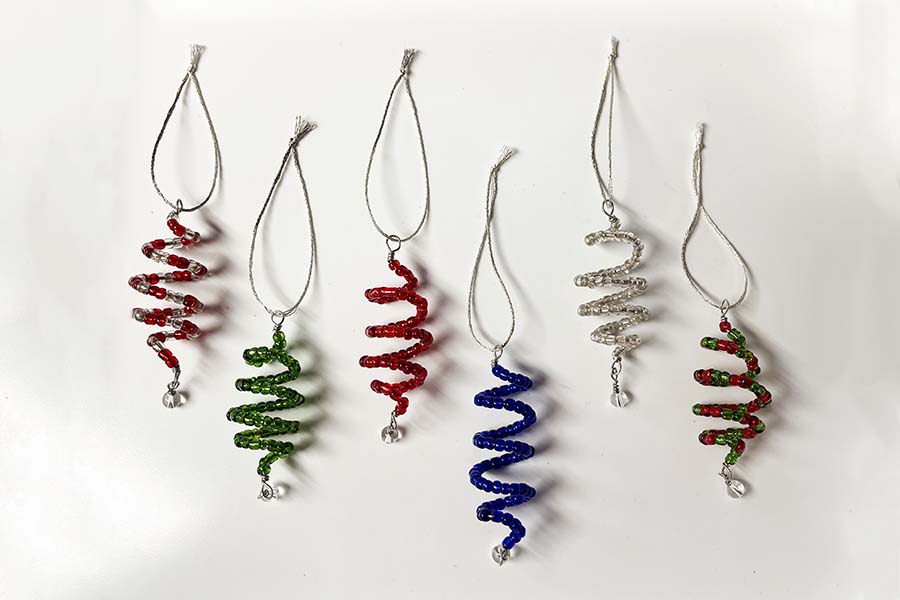
Hang these beauties on any tree, anywhere you need a bit of festive sparkle, or add them to a bow on a gift to make it extra special!!