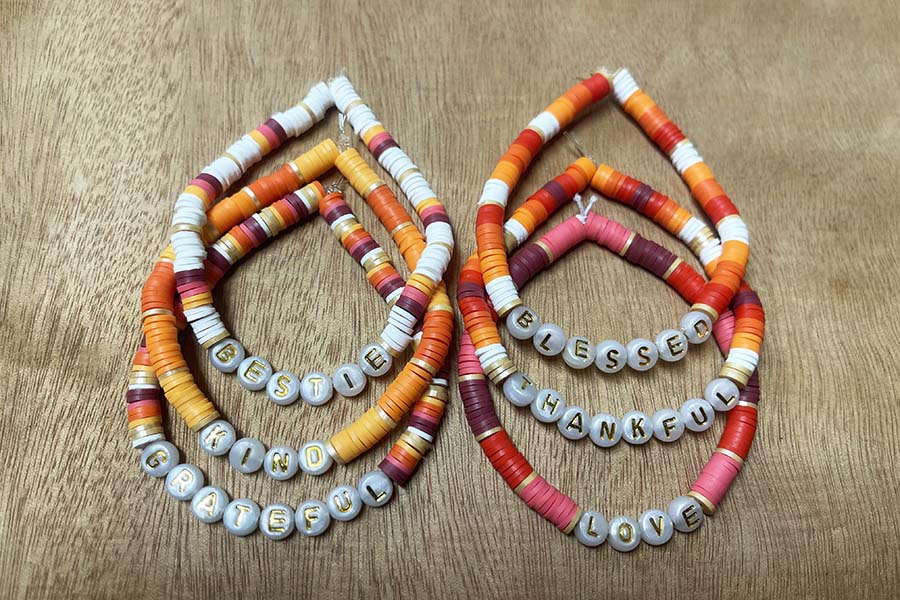
Thanksgiving Friendship Bracelets – A Fun Gratitude Kids Craft
Both of my daughters have been really into making bracelets lately, so when we thought about fun gratitude crafts, Thanksgiving friendship bracelets seemed like an obvious choice. Easy for kids to make and share and there are SO many bead options to choose from these days. It’s also a relatively mess-free craft, so it could be a great kids project to bring to Thanksgiving dinner.
For these bracelets, we chose heishi beads which come in so many colors and found gold letter beads that compliment them and add to the festiveness! We also created the bracelets with a wide range of words and color patterns, so they work both Thanksgiving and beyond.
Ready to create some fun wearable crafts for Thanksgiving?
ANOTHER GREAT GRATITUDE KIDS CRAFT: Thankful Tree: 2 Trees Every Kid Can Make This Thanksgiving
ANOTHER FUN JEWELRY PROJECT: DIY Best Friend Necklaces: SO Easy & Better Quality Than Store Bought Ones
Thanksgiving Friendship Bracelets
WHAT YOU’LL NEED:
- Heishi Beads in Thanksgiving/Fall colors (I chose…)
- Gold Letter Beads
- Elastic Beading Cord about 0.8mm thick (I chose Stretch Magic)
- Scissors
- Ruler or Tape Measure
- Piece of embroidery thread, yarn, or string that can wrap around your wrist at least once
- Pin or Toothpick
- Small Clothespin or Binder Clip (we love these cuties!)
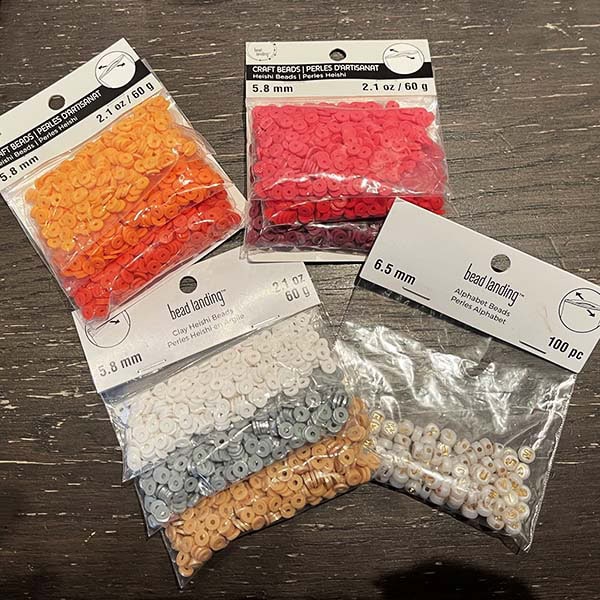
TIPS ABOUT SUPPLIES:
- HEISHI BEADS – There are so many beads that could be used for these bracelets. We picked Heishi beads in oranges, reds, gold and white (pick any colors that scream Fall) because they are pretty easy to use by kids, look festive, and can create so many different patterns.
- LETTER BEADS – Most letter beads come in black lettering, but we found these gold letter beads that look great with the fall colors.
- BEADING CORD – I am a fan of Stretch Magic’s clear elastic cording IF you knot it properly and allow enough slack to get it on and off your hand. My older daughter swears by the white elastic cording similar to this and uses it for all of her pony bead bracelets. Either will work as long as its about 0.8-1.0mm thick.
PREPPING THE Supplies
If you are creating more than one bracelet, some of the supplies can be prepped all at once. This makes the assembly process easier, particularly with kids.
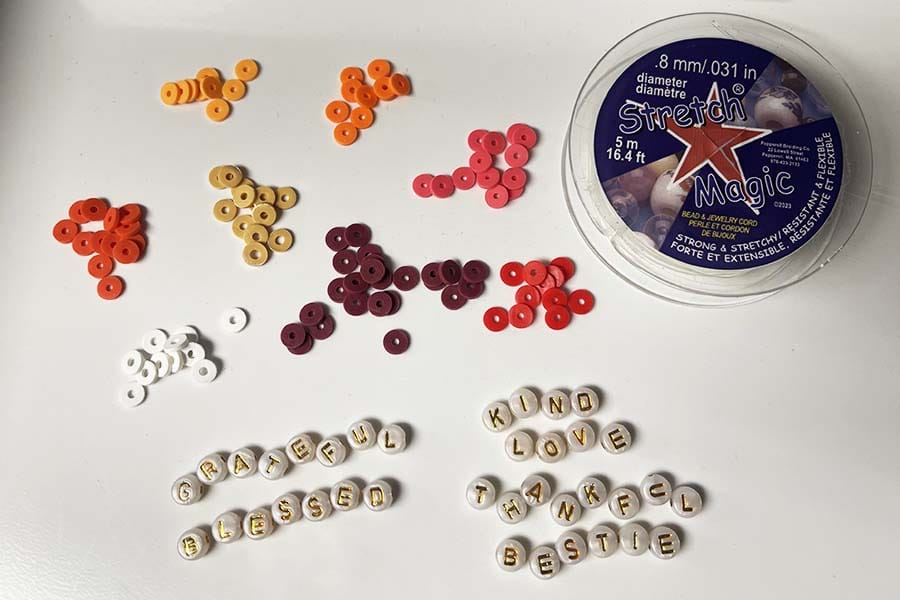
1. If you are planning on creating color patterns with the beads (not random), then pull out a few of each color/type. It allows kids (and adults) to lay out different color combos without making a huge mess. See below for the patterns I created as some inspiration. I also like to lay out all of the words, so we know that we have all of the letters (and the rest can be put away).
2. Next, take the string/yarn/embroidery thread and your tape measure/ruler and measure out the length you will need for a bracelet to wrap comfortably once around the wrist. Typically, a kid’s wrist is about 6.5″ and an adult’s is 7″. Cut a piece for a kid (below in green) and/or adult (below in blue) with your scissors and set any extra aside. Keep the guide close as you will use it later when stringing beads, to see how many you need to add or remove. NOTE: Occasionally, an adult may have a larger wrist, so please measure them if you are unsure.
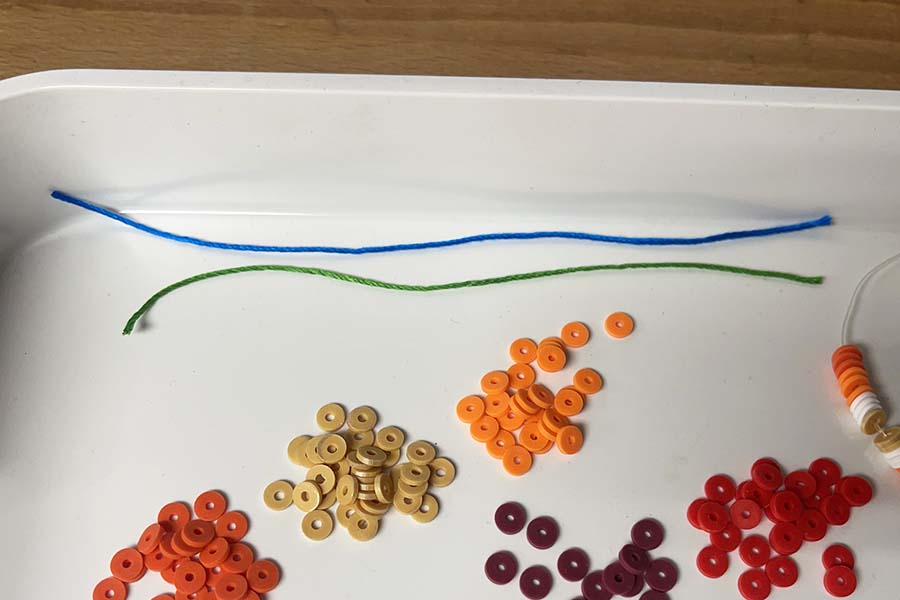
3. Now that you have your string guide for the beads, its time to cut the actual cord pieces. Add 3″ to each side for tails that you will use for tying off the bracelet. For a kid you’ll have 12.5″ (6.5 + 3 + 3) and for an adult you’ll have 13″ (7 + 3 + 3). Using your tape measure/ruler, measure out and cut as many cord pieces as you will need for bracelets. Be sure to not stretch out the cord, so the measurement is accurate. Set the spool of cording aside.
Bracelet Patterns
Once you are ready to start stringing the beads on, pull out a small pile of each bead color. Here are the color patterns I used, in case you need some inspiration.
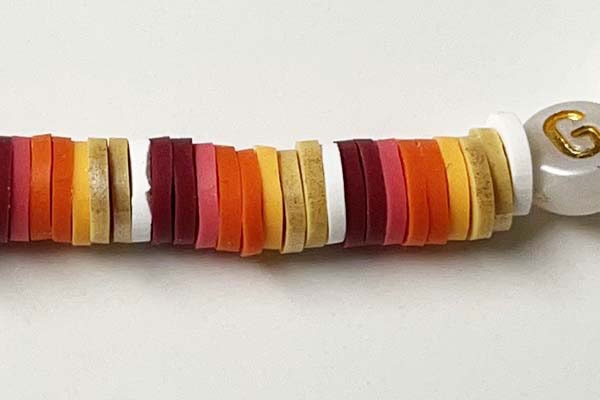
2 Maroon, 1 Pink, 2 Dk Orange, 1 Lt Orange, 2 Gold, 1 White
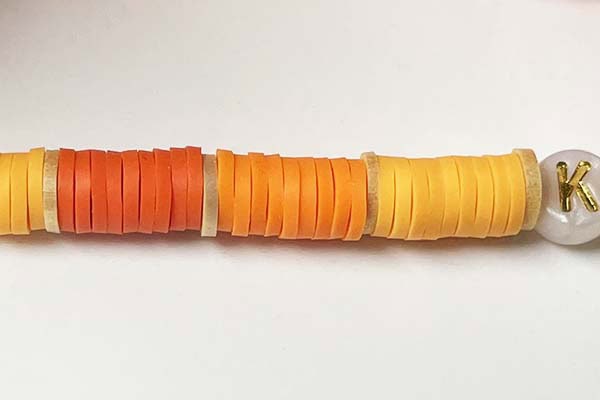
9 Dk Orange, 1 Gold, 9 Orange, 1 Gold, 9 Lt Orange, 1 Gold
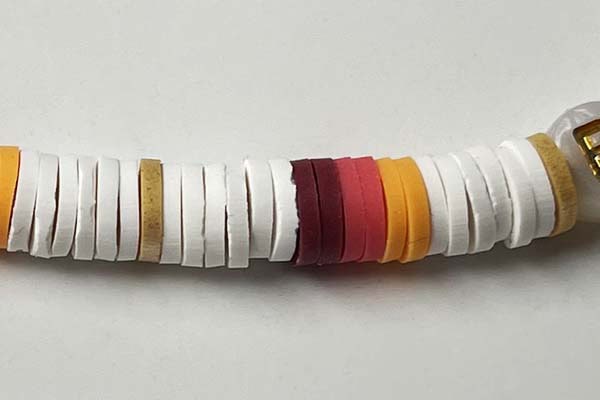
6 White, 2 Maroon, 2 Pink, 2 Lt Orange, 6 White, 1 Gold
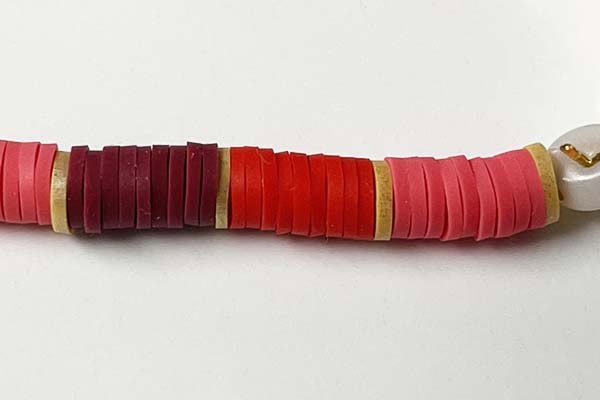
9 Maroon, 1 Gold, 9 Red, 1 Gold, 9 Pink, 1 Gold
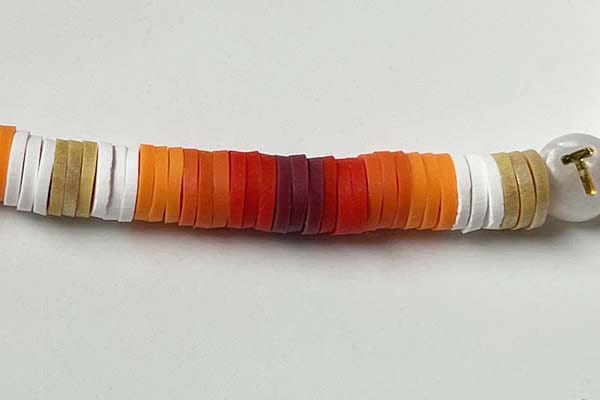
3 White, 3 Orange, 3 Dk Orange, 3 Red, 3 Maroon, 3 Red, 3 Dk Orange, 3 Orange, 3 White, 3 Gold
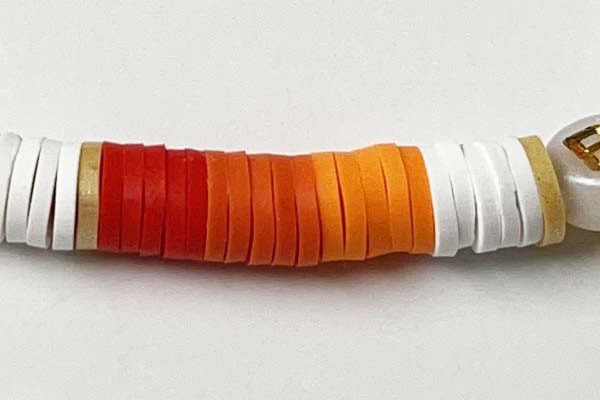
5 Red, 5 Dk Orange, 5 Orange, 5 White, 1 Gold
Assembling EACH BRACELET
4. Personally, I like to start from the center of the bracelet (the word) and work my way out, so string the letter beads on first. An obvious callout (but I’m still going to say it)…pay attention to how you string the letters, so they are in the right order and direction. You do not want to find a misspell or wrong direction letter after you’ve added the other beads.
5. Now is the fun part! Add your beads to one of the sides. Don’t worry about having the right amount yet because there is time to adjust once beads are on both sides. Once you have a few inches strung, use your clothespin or binder clip to secure the end of the cord, so no beads can come off as you string the other side.
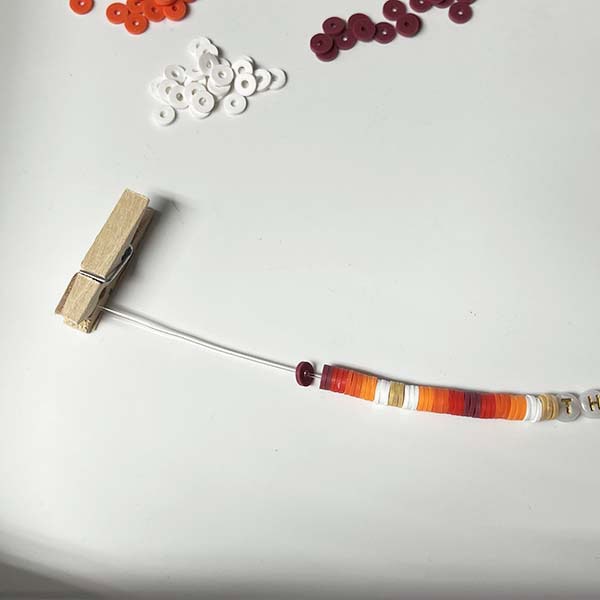
6. Once beads are on both sides of your word (and the number of beads on each side are the same), pull out that handy guide. Lay the guide down on a flat surface, right next to your string of beads. If there are more beads than the guide, take a few beads off each side (so they remain even). If there are less beads than the guide, add the same number to each side (continuing your pattern). THE GOAL is for the length of beads to be the same length as the guide, so you know that the bracelet will fit properly on the wrist.
FINISHING THE BRACELET
7. To finish the bracelet we need to tie the two ends of the bracelet together. With both tails together, make a loose knot (see below). Take your pin or toothpick and stick it in the loop of the knot (This will help you slide the knot as close as possible to the beads before you pull it tight). Hold the ends of the tails with one hand and slowly slide the knot close to the beads using the pin/toothpick. Pull tight, remove the toothpick/pin and knot number one is complete.
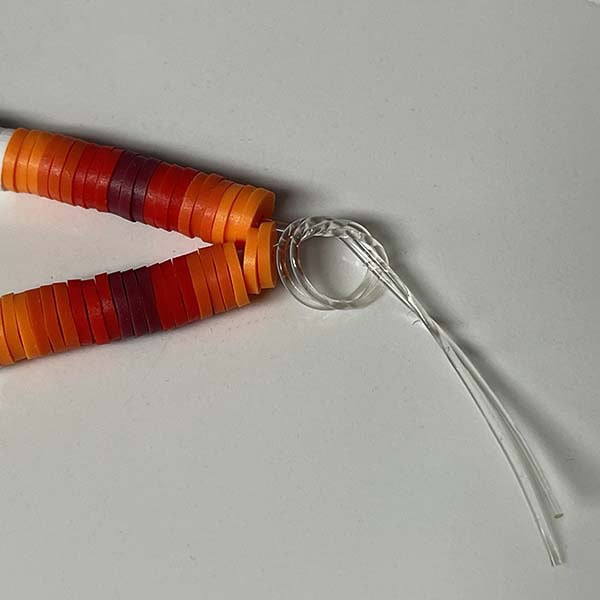
8. Repeat the steps in #7 to create a second knot. Test out the knots by gently stretching the bracelet open, so the knots feel tension (this also tighten the knots from another direction.
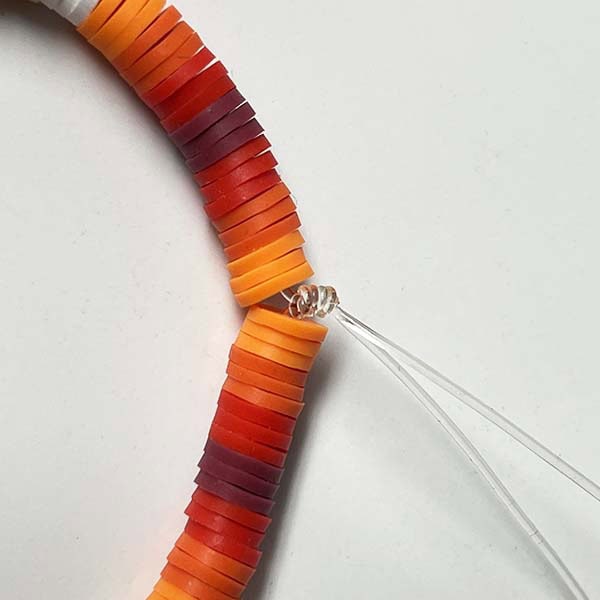
9. Cut the majority of the tails off, leaving about 3/8″.
These Thanksgiving friendship bracelets are so easy, fun, and super kid friendly! Make 1, make more! A great gift to share with friends and show your gratitude for them!