Snowball Catapult & Snowball Launcher: 2 Fun Winter STEM Activities
My family and I were at the Hall of Science in Queens, NY last weekend, which is a place we have LOVED for years for their hands-on exhibits and labs and kid-friendly/kid-focused approach to science. Since it is winter right now, it is the perfect time for a lab on force and motion: creating a Snowball Catapult and a Snowball Launcher. Even though the snowballs were really pom poms, both were super easy to make for the kids and even more fun to shoot at the family members.
Both projects require very few supplies and everything is inexpensive (popsicle sticks, balloon, rubber bands to name a few items). If you have younger kids, some markers or colored pencils, and are able to find white cups, you can turn the snowball launcher into a snowman launcher and create a fun, cute snowman face on the cup. I unfortunately did not realize how difficult it would be to find plain white paper or styrofoam cups at the store. It seemed like every color, but white, so we bought these festive blue patterned ones that were wintery enough. Also, if you have older kids, they will just be happy to create a launcher, so they can shoot pom poms at each other. So, ready for some winter crafting fun?
FOR MORE FUN WINTER KIDS CRAFTS/ACTIVITIES
SNOWBALL CATAPULT
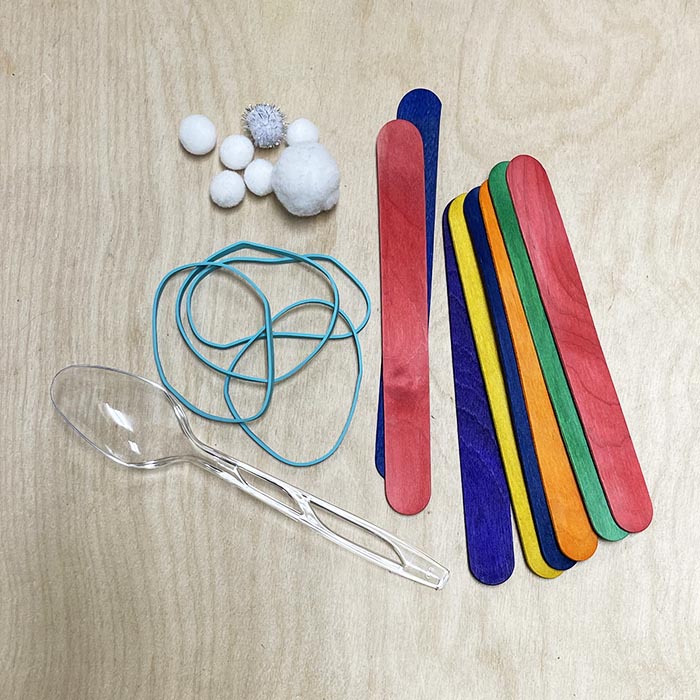
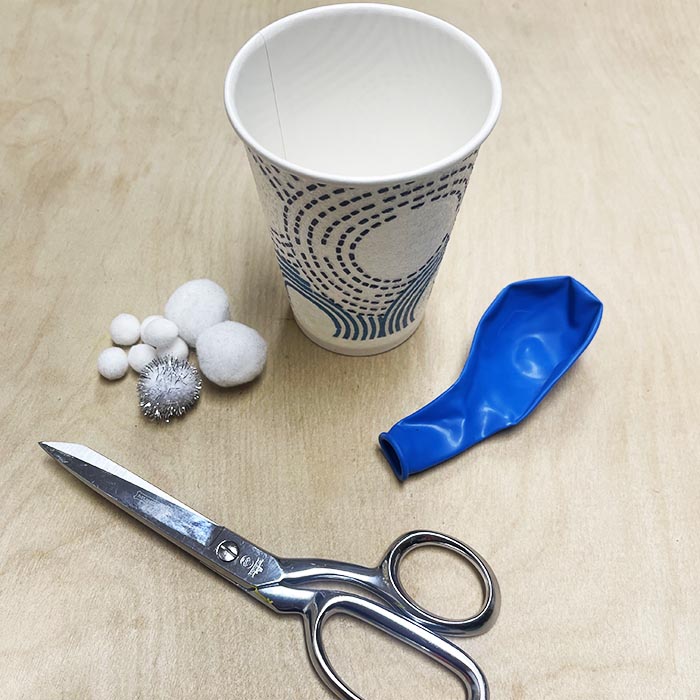
WHAT YOU’LL NEED:
- 8 Jumbo Popsicle Sticks
- 4 Medium Sized Rubber Bands
- Plastic Spoon
- Pom Poms (or Mini Marshmallows)
MATERIAL TIPS
- Popsicle Sticks – These “jumbo” popsicle sticks are 6″ long x 3/4″ wide, but anything close to those measurements will do. I found them in fun colors, but plain will work (or have your kids decorate them with markers for more added fun).
- Rubber Bands – I got these out of a large mixed bag of rubber bands from Target. Medium size just means not the super thin or extra thick rubber bands.
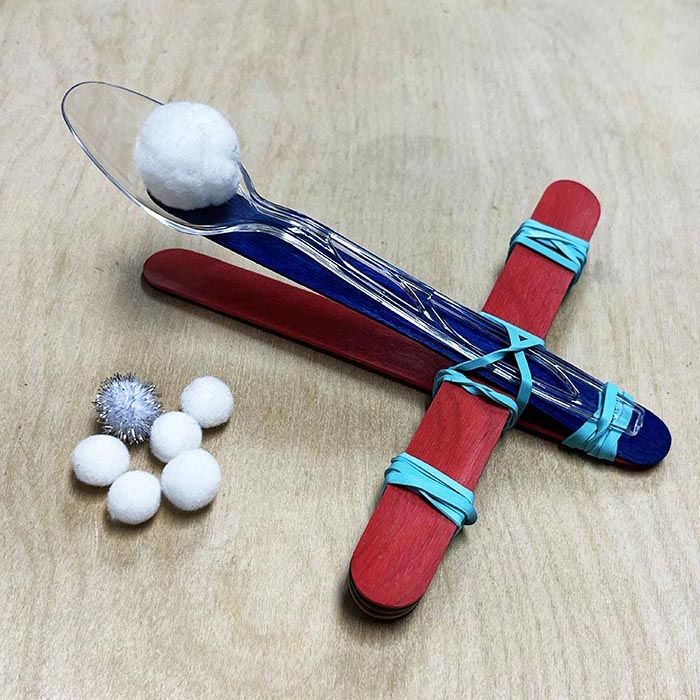
- Pom Pom “Snowballs” – For this project I grabbed a number of white/silver pom poms from our enormous pom pom collection. For added sweet fun, you could swap them out for mini marshmallows instead.
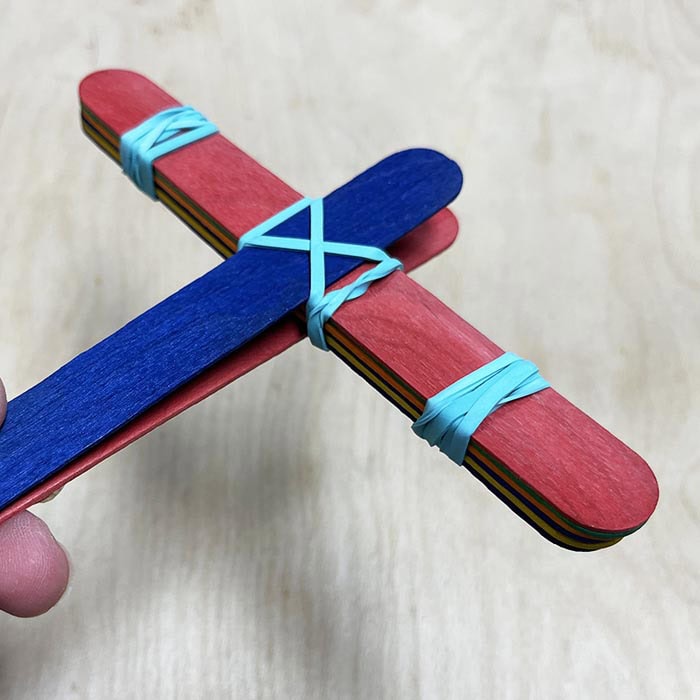
1. Start with the base of the catapult. Stack 6 of the popsicle sticks and tie them together by wrapping rubber bands around each end.
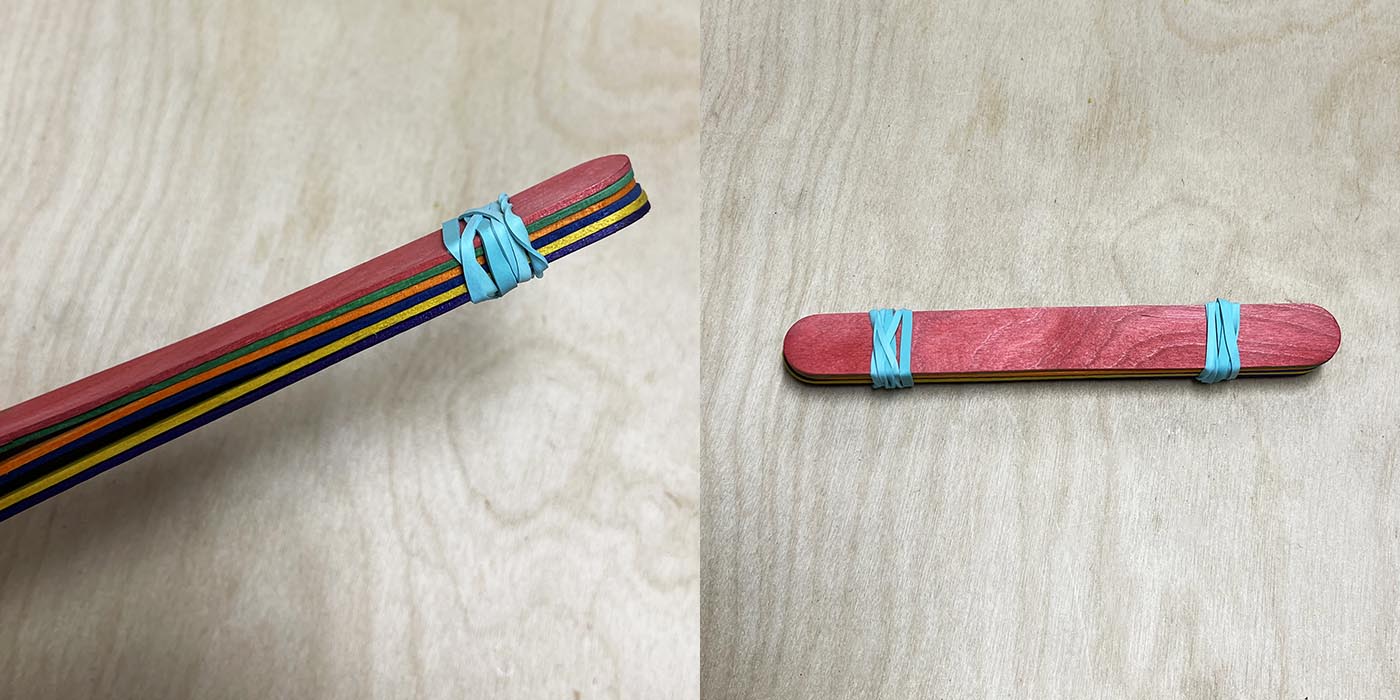
2. Take the last 2 sticks and place one over and one under the base. Slide them to one side of the base, like in the pic below, so we can create the throwing arm.
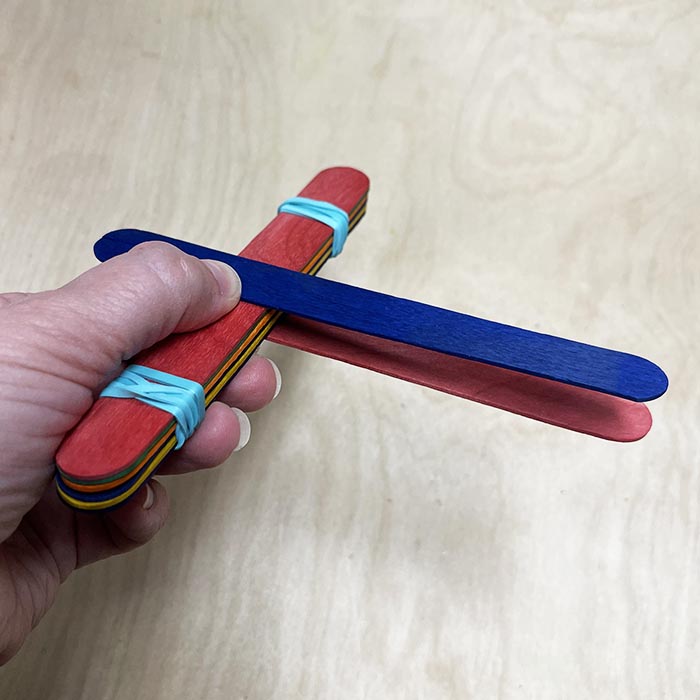
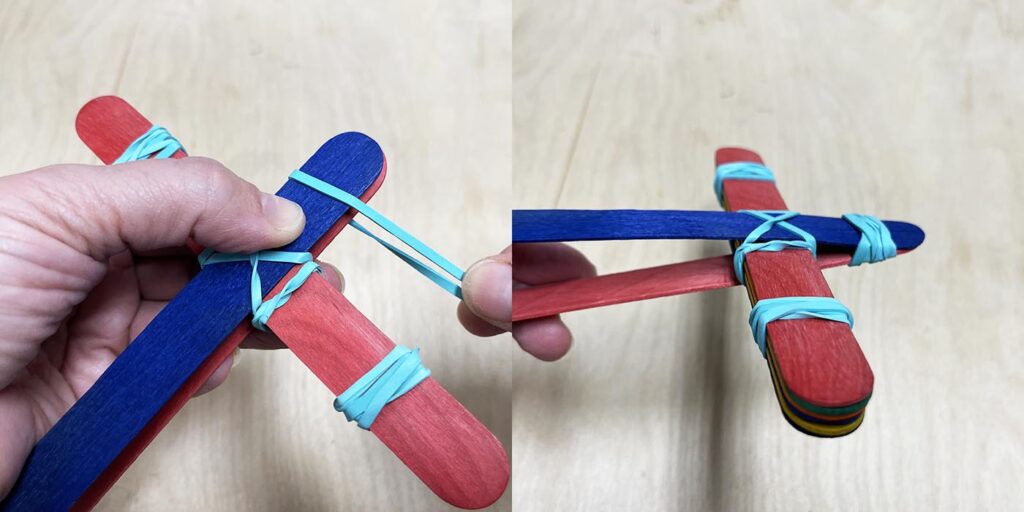
3. Now we are going to secure those sticks to the base. Take a rubber band and wrap it diagonally around all of the sticks (top left pic). Give the rubber band a twist to secure it and wrap it around one side of the base (top right pic). Give the rubber band another twist and wrap it diagonally around (in the other direction) all of the sticks (bottom left pic) to create an X. Finally, give it one last twist and wrap it over the other side of the base (bottom right pic). If there is extra slack, like with mine, wrap it around the base again.

The finished catapult base with arm should look something like this.
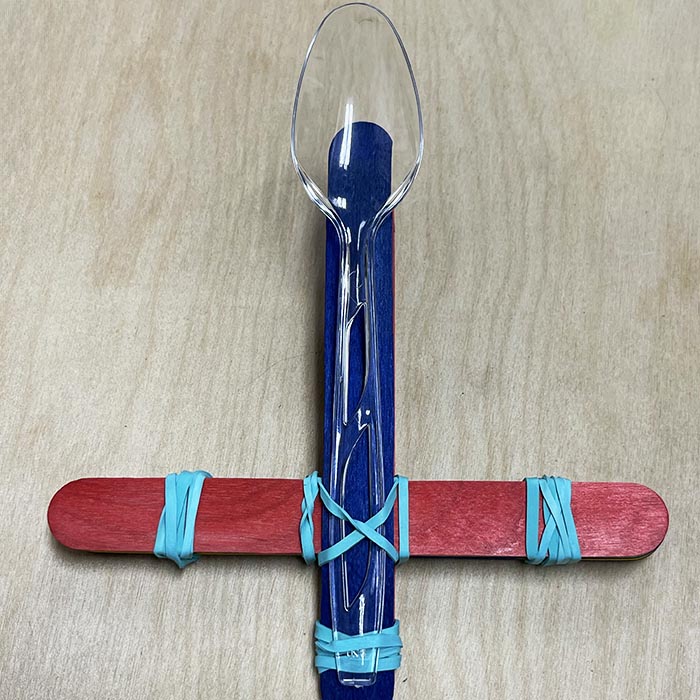
4. Once the arm is secured to the base, we can add the final bit of tension, so the catapult will actually launch snowballs. Take the last rubber band and wrap it tightly around the short end of the arm, like in the pic below.
5. Last step! Add the spoon to the catapult, so it can hold the snowballs (pom poms or marshmallows). Slide the handle under the rubber bands on the arm to secure.
And there you go! A super easy and fun catapult that your kids can make with minimal supplies. Just pull the spoon back and LAUNCH!
SNOWBALL LAUNCHER
WHAT YOU’LL NEED:
- Paper or Styrofoam Cup
- Balloon (about 12″)
- Pom Poms
- Scissors
MATERIAL TIPS
- Cup – For this project any medium size paper or styrofoam cup will do. Plastic might not hold its shape when you pull on the balloon to launch, so if you choose plastic, make sure its pretty thick and sturdy. As I mentioned above, if you can find a plain white cup, your kids can turn the cups into snowman faces (extra crafty bonus). Since my kiddos are getting older (and I couldn’t find white), they didn’t mind the patterns.
- Balloon – Any medium size balloon (11″, 12″) will do. Just don’t pick a small water balloon or 5″ size or something so jumbo like 18″ or bigger.
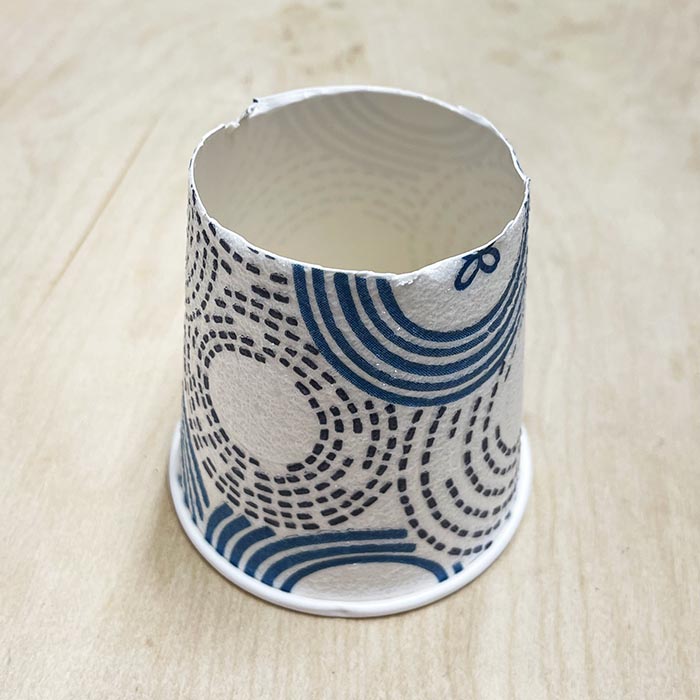
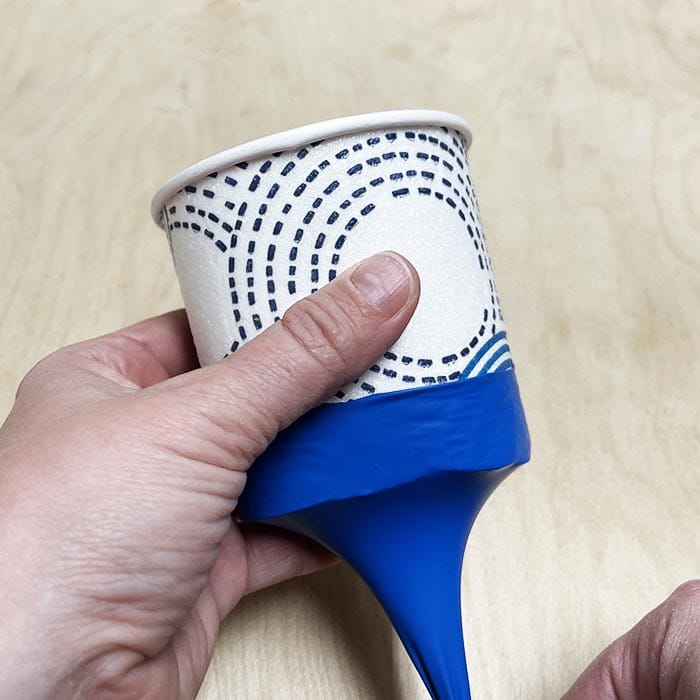
1. Cut off the bottom of the cup.
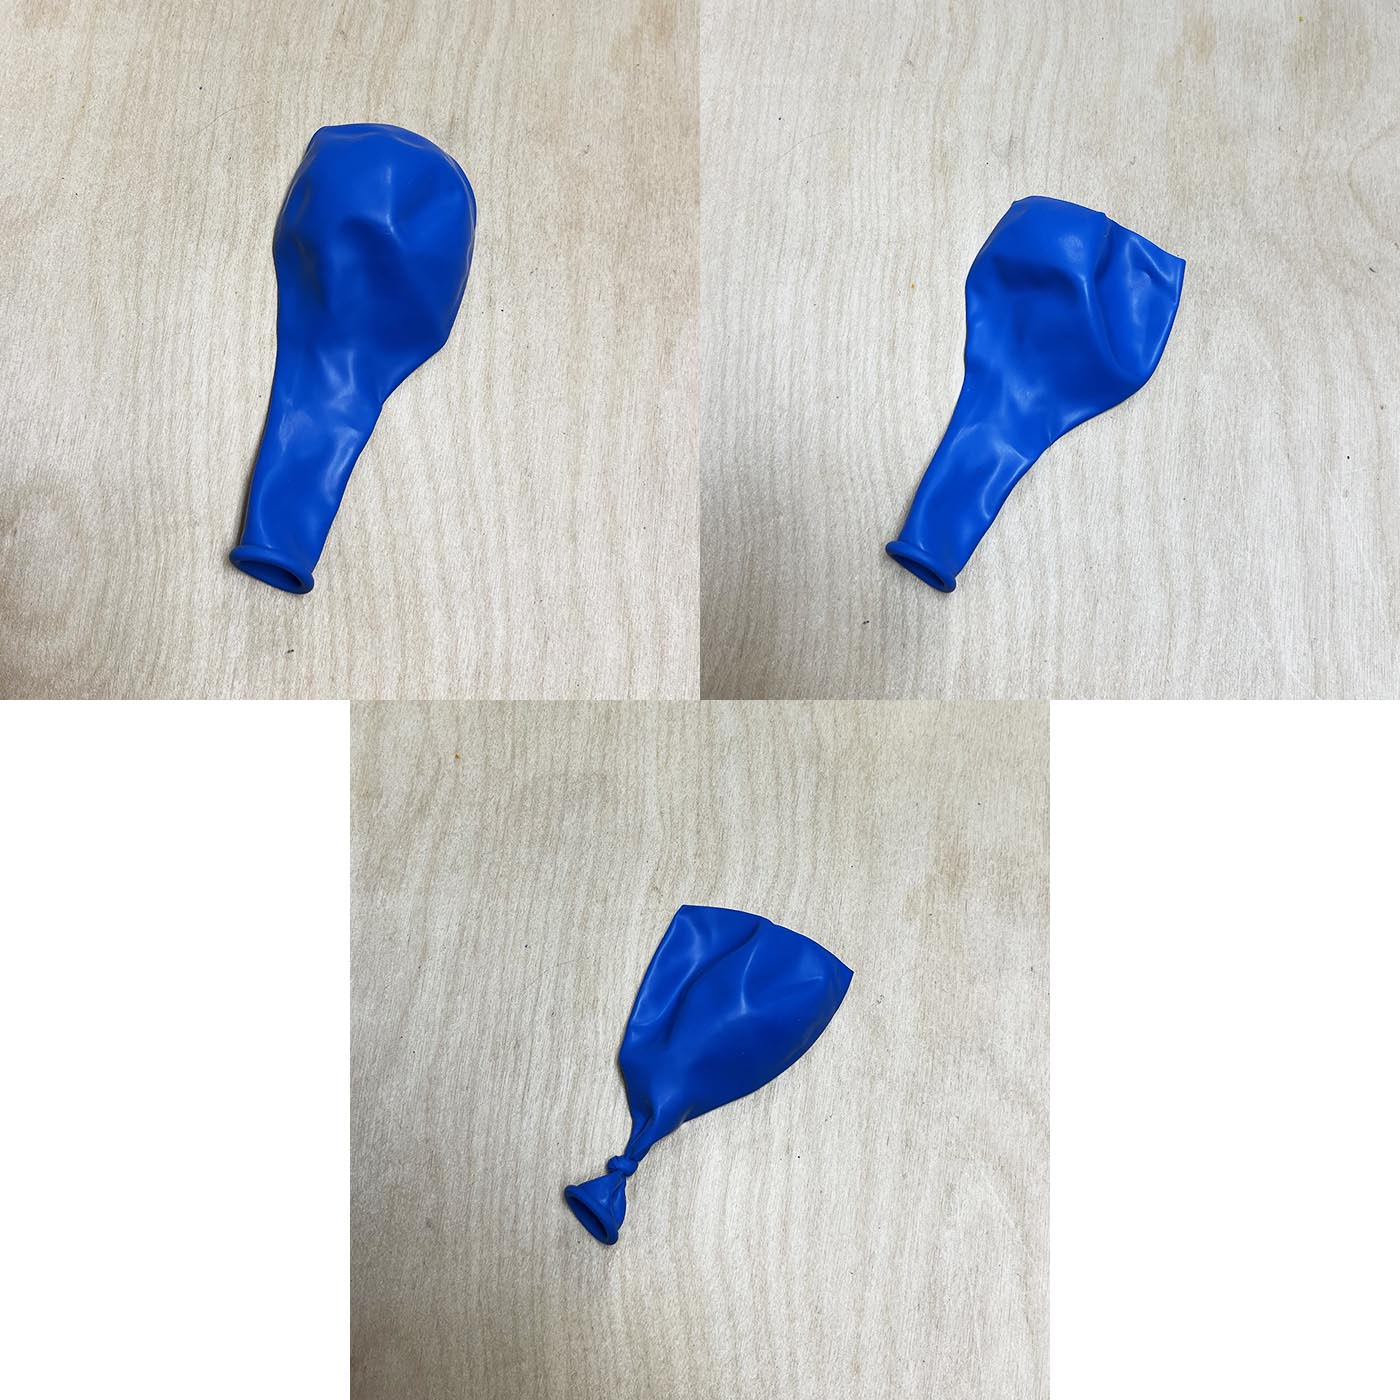
2. Cut the top of the balloon off and then tie a knot in the bottom (neck) of the balloon.
3. Now we are ready to make the launcher. Place the cup, cut side up in front of you. Before you add the balloon to the cup, put your fingers inside the cut end of the balloon and stretch it out a bit (top left pic). This will make it easier to place on the cup. Once its stretched a bit, place the balloon knot in the center of the cup (top right pic) and pull the balloon down the sides of the cup to secure (bottom pic).
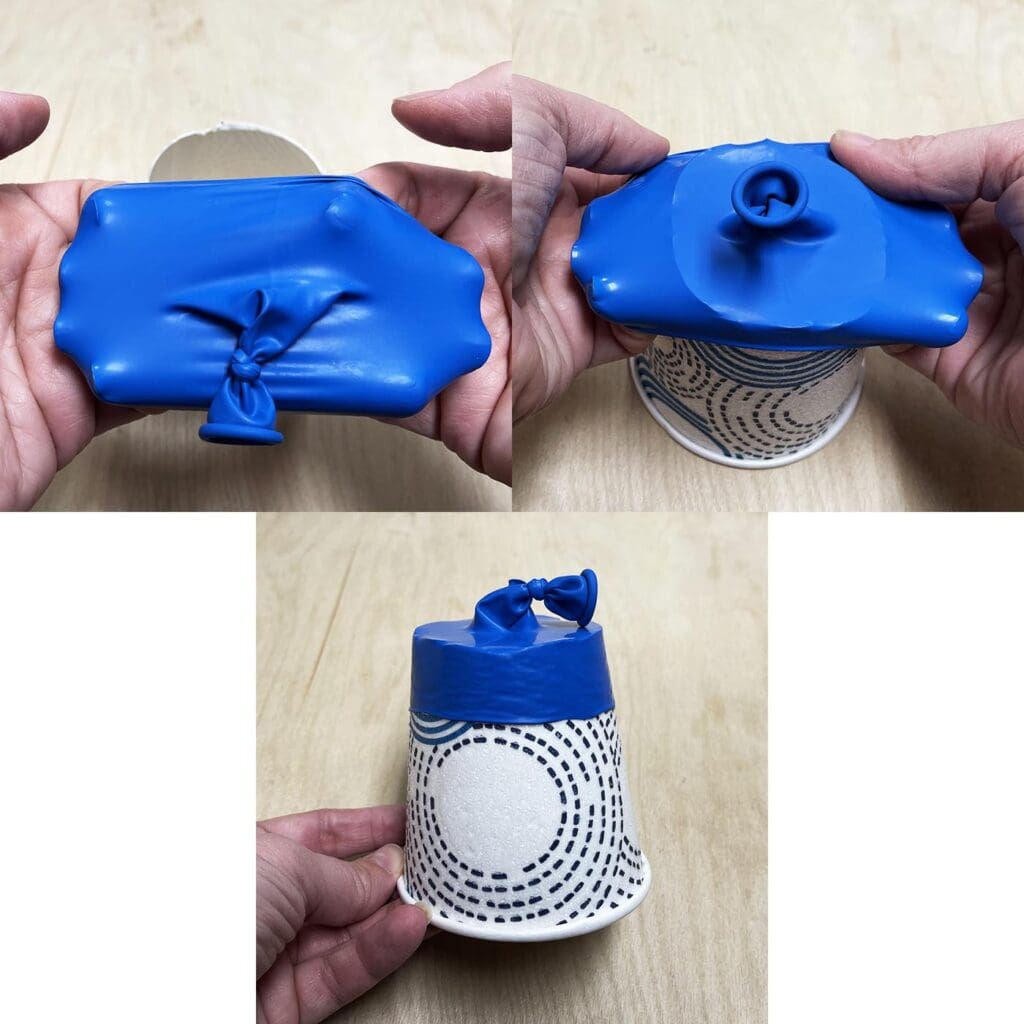
4. Test out the launcher: Pull back on the balloon knot to make sure its snugly attached to the cup.
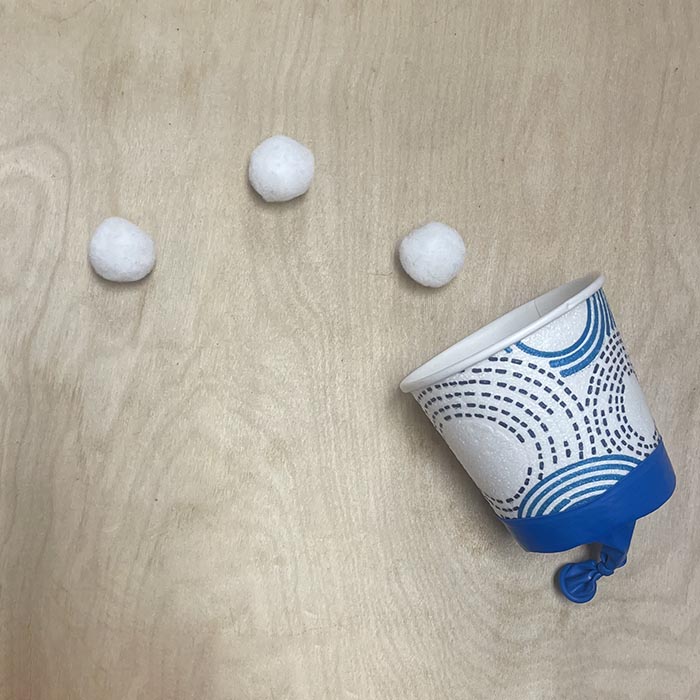
Now, add a pom pom, or two, to the cup. Aim and pull back on the balloon knot to fire!
So, there you have it. Two super easy, inexpensive and quick winter crafts for your kids to make that will entertain them this cold, snowy season!! They also make fun, STEM activities to learn about motion and force! Have fun!